And are the bolts M8? That's what I'd need to fit into the bottom-pieces that fit the schuco rail. The fastensol bit that goes in the rail is much wider than the Schuco bits (which fit into 8mm gap).
Turns out that I do have enough rail - just. I need 32.4 m and have 32.72m But I would need at least 6 splices. Relatively easy to bodge with bits of ali or stainless and some bolts. But it does have to be strong enough to keep the panels on the roof in a gale. The right size splices would work best. And I have enough brackets and M8 rail-mount nuts, so this could work.
There must be a fair amount of this stuff being replaced about now, but no-one thinks to sell the bits on ebay. I even tried ebay.de
Identifying rails
Re: Identifying rails
DIY deep 1960's house retrofit: http://wookware.org/house/retrofit
MVHR, IWI, EWI, 3G windows, 7kW PV, 16kWh battery, woodburner,
perimeter insulation, extension, garage conversion, UFH, garden veg
MVHR, IWI, EWI, 3G windows, 7kW PV, 16kWh battery, woodburner,
perimeter insulation, extension, garage conversion, UFH, garden veg
Re: Identifying rails
I found most of the old stuff 8mm ad I used unistrut zebs of this size with the existing bolt
Re: Identifying rails
Update for anyone that cares.
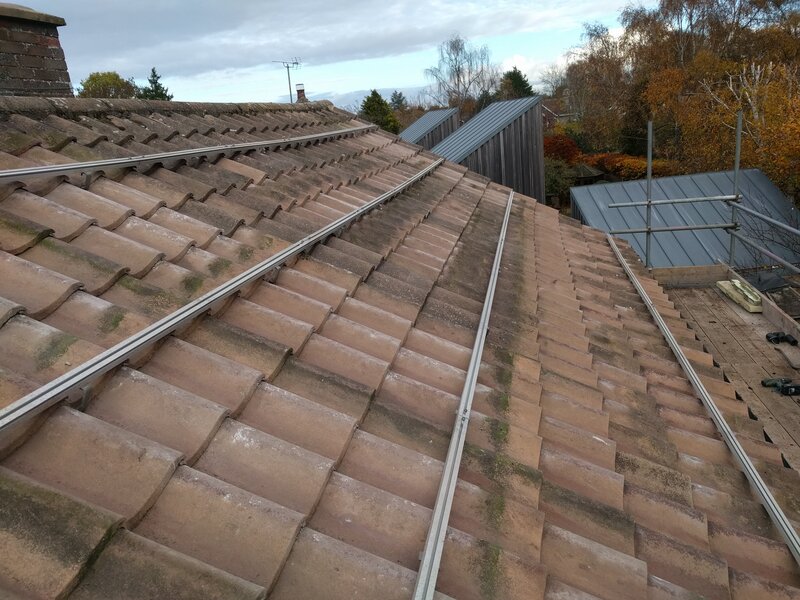
I found that K2 solidRail is similar enough to the old Schuco rail (with top and bottom slots) that it could be used. It's 2mm taller (32 vs 30), the bottom slot is 3mm wider (25 vs 22) and the top slot is 2mm wider (10 vs 8). The only tricky bit is that the old slot-nuts will be a bit iffy in a 10mm slot. So some Zeb nuts do look like a good option there. However I didn't need that in the end as I had just enough rail to re-arrange 4 shorter rows into two full-length rows.
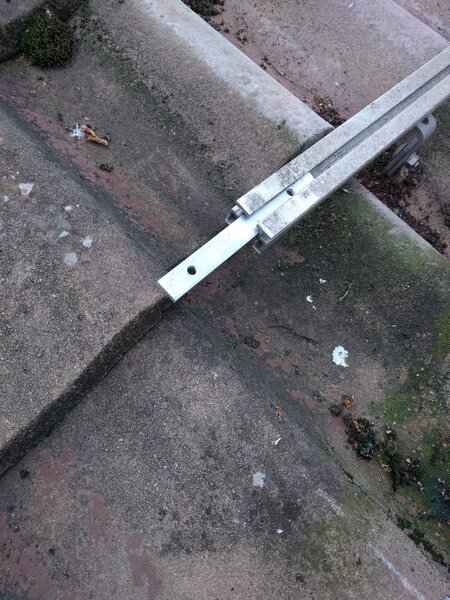
New jointing pieces were easy to make from 20mm x 4mm ali bar about 150mm long. Then put two M8 threaded holes near the ends. And yes, Fastensol fixings do have M8 bolts so fit into the existing slot-nuts. The only catch is that they are designed for a bit more depth on the top rail section so all the bolts are about 2-3mm too long and bottom out just as they start to clamp the panels. So I had a very boring evening cutting 18 stainless bolts shorter.
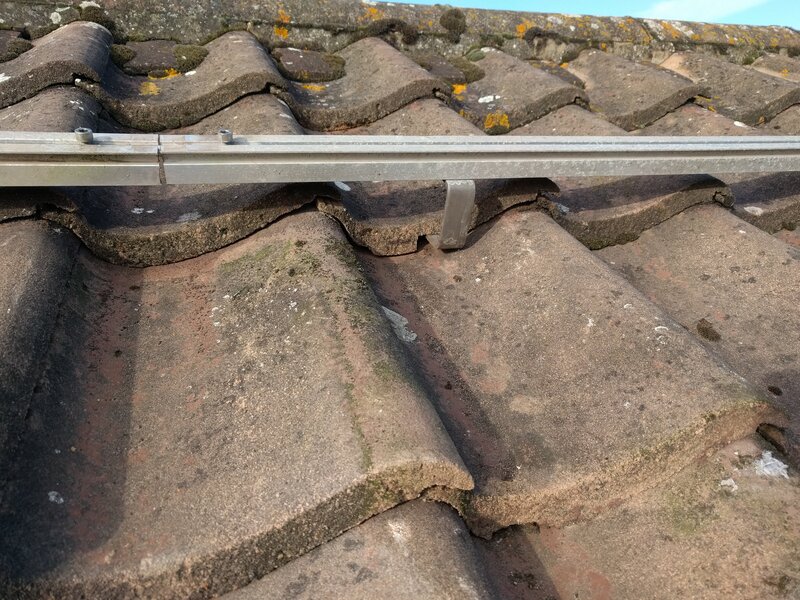
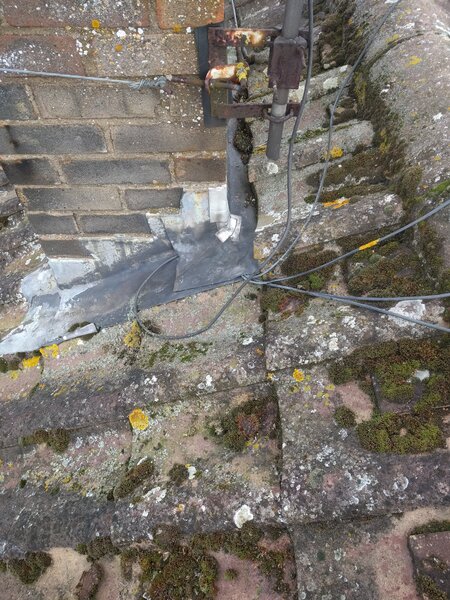
Lots of panels are now attached to the roof, and I did a significantly more thorough job then the original installers who had only put 1 lag screw in quite a lot of the brackets, a few had missed the rafter, the rail surface was tilted relative to the roof, the cabling was pushed up through the chimney flashing on the other roof aspect and draped over the ridge, the tiles weren't notched to fit over the brackets without a big gap/wobble, and none of the connectors were tied up out of the water.
On the other hand it all stayed up and working for nearly 15 years so it was clearly 'good enough'.
Some pics probably make it easier to get an idea:
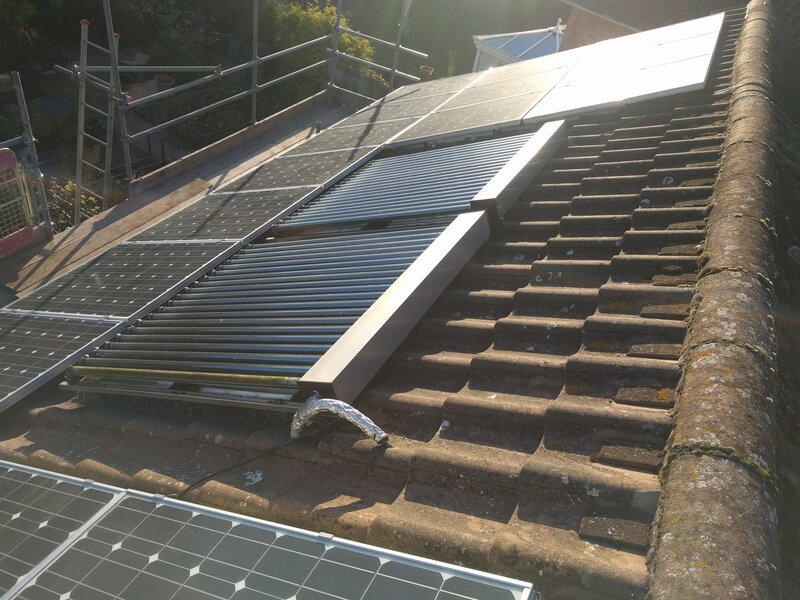
Before (solar thermal + 3 rows of PV ):
Rail joiners
Rails rearranged for 2 rows
Tile notched around bracket:
Old wiring through chimney flashing:
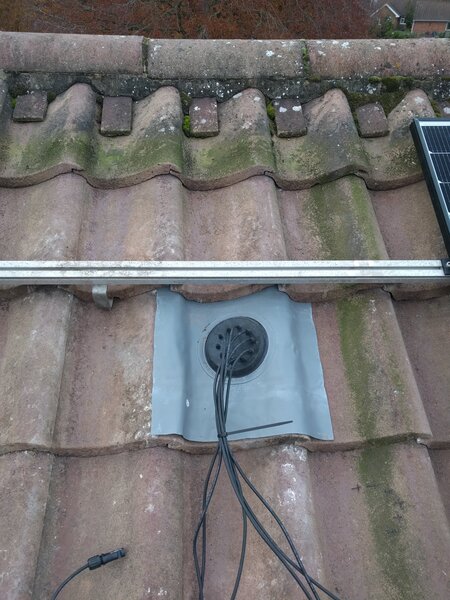
Fancy new flashing:
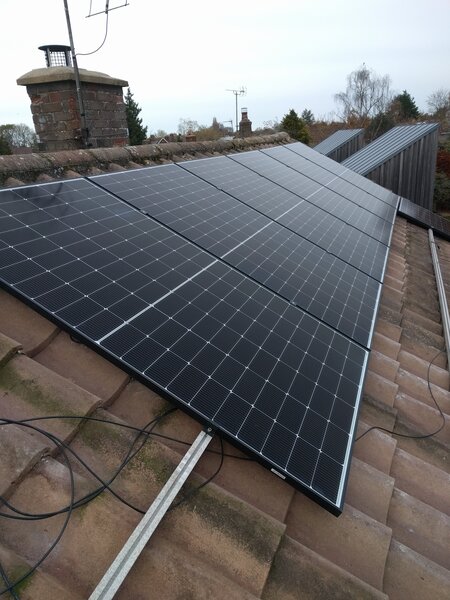
Shiny new massive panels:
I found that K2 solidRail is similar enough to the old Schuco rail (with top and bottom slots) that it could be used. It's 2mm taller (32 vs 30), the bottom slot is 3mm wider (25 vs 22) and the top slot is 2mm wider (10 vs 8). The only tricky bit is that the old slot-nuts will be a bit iffy in a 10mm slot. So some Zeb nuts do look like a good option there. However I didn't need that in the end as I had just enough rail to re-arrange 4 shorter rows into two full-length rows.
New jointing pieces were easy to make from 20mm x 4mm ali bar about 150mm long. Then put two M8 threaded holes near the ends. And yes, Fastensol fixings do have M8 bolts so fit into the existing slot-nuts. The only catch is that they are designed for a bit more depth on the top rail section so all the bolts are about 2-3mm too long and bottom out just as they start to clamp the panels. So I had a very boring evening cutting 18 stainless bolts shorter.
Lots of panels are now attached to the roof, and I did a significantly more thorough job then the original installers who had only put 1 lag screw in quite a lot of the brackets, a few had missed the rafter, the rail surface was tilted relative to the roof, the cabling was pushed up through the chimney flashing on the other roof aspect and draped over the ridge, the tiles weren't notched to fit over the brackets without a big gap/wobble, and none of the connectors were tied up out of the water.
On the other hand it all stayed up and working for nearly 15 years so it was clearly 'good enough'.
Some pics probably make it easier to get an idea:
Before (solar thermal + 3 rows of PV ):

Rail joiners

Rails rearranged for 2 rows

Tile notched around bracket:

Old wiring through chimney flashing:

Fancy new flashing:

Shiny new massive panels:

DIY deep 1960's house retrofit: http://wookware.org/house/retrofit
MVHR, IWI, EWI, 3G windows, 7kW PV, 16kWh battery, woodburner,
perimeter insulation, extension, garage conversion, UFH, garden veg
MVHR, IWI, EWI, 3G windows, 7kW PV, 16kWh battery, woodburner,
perimeter insulation, extension, garage conversion, UFH, garden veg