DIY 24v 340Ah LiFePO4 Battery Boxes
Posted: Fri Dec 15, 2023 1:26 am
Well I've finally done it!
After reading Joeboys thread Idiot's guide to a self build battery, I thought great, now is my time! Then I spent way too long reading tons of threads on other forums, finally deciding, negotiating with the sellers and seeking clarification, patiently waiting through a hurricane and floods in Shenzhen, and watching the slow boats travel the oceans to the UK, but now they're here, they're built, with pictures below!
Although It took 72 days from ordering for the Gotion 340ah cells to arrive and 93 days for my Battery boxes to get here, but two weeks of that was stuck in felixstowe.
I used Gobelpower for the cells and Shenzhen Luyuan for modifying battery boxes for them (They're larger than standard 280-304 Ah cells) both were on Alibaba (credit card and DDP important), they're two of the well regarded sellers for real grade A cells with full test reports. But please read here, or other online forums for up to date trustworthy sellers if anyone reads this on my word alone. Many suppliers will re-laser the barcode on a 'grade B' cell and re-sell as grade A. Ask to see the test reports, and then double check with the Gobelpower universal QR checker https://www.gobelpower.com/lifepo4_decoder.html, or the LiFePoQR app https://play.google.com/store/apps/deta ... =web_share to check your barcode.
Luyuan couldn't get the larger Gotion 340Ah Cells, which I ended up getting from Gobel for £2,940 ($3,612) DDP. If I had gone for 280 / 304's I would have considered it though. Docan also had 340Ah cells but they're known to have sold re-lasered grade b as grade a, as well as grade a, so hit and miss..
Price for the modified boxes was £792 DDP to UK. ($967 USD) So £264 per box with JK BMS RS485/CAN connector ETC but also no Screen, I'll be connecting to Victron so don't need it.
So 3 x Battery boxes @ 26kWh total for £3,732 / $4,579 Delivered (Caveat, I think I've now spent way too much of my free and not so free time prepping and building all of this, so maybe not a great option if you don't have any time to spare!
After the long wait and prepping for them, the cells arrived first, but I didn't have enough busbars to balance them all, and actually, top balancing is only necessary for low grade, random batch or fake cells.
All the data sheets from manufacturers now specify an absolute minimum termination (tail current) at 0.05C, so 14a for a 280ah cell, top balancing as is common below this will damage LFP cells. Basically if they're decent cells, and you have a good BMS or active balancer it shouldn't be necessary.
Anyway, pictures!
Cells arrived! 1,088Wh each x 24 for three 8.7kWh 8S 24v batteries @ 26kWh total storage.
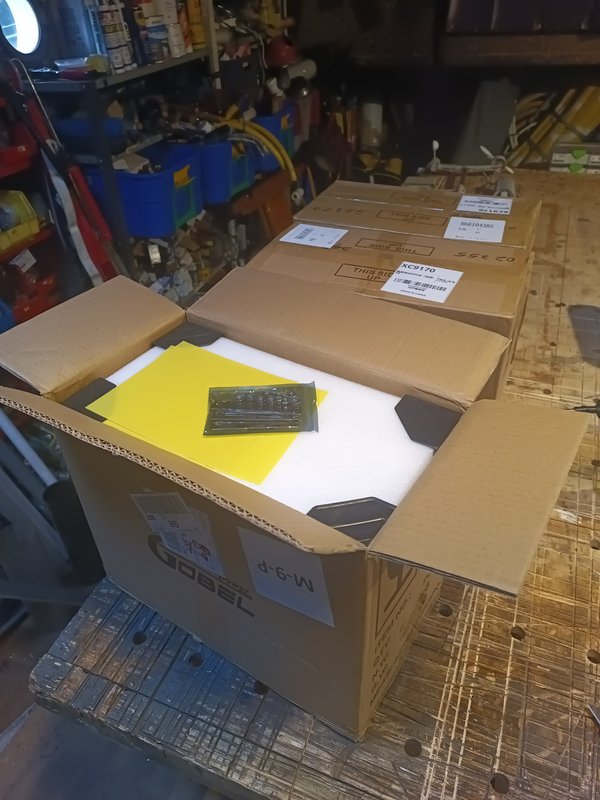
They were well packed, with UN codes for batteries, and DDP all taxes paid.
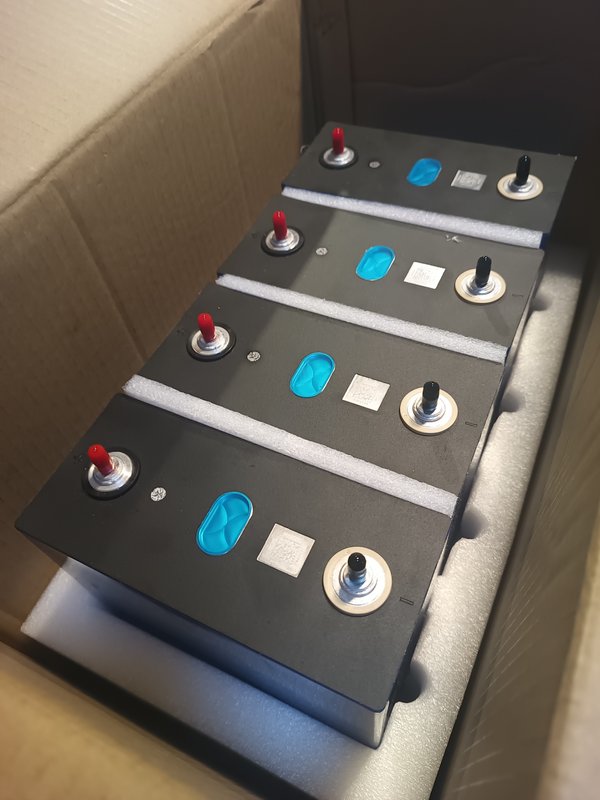
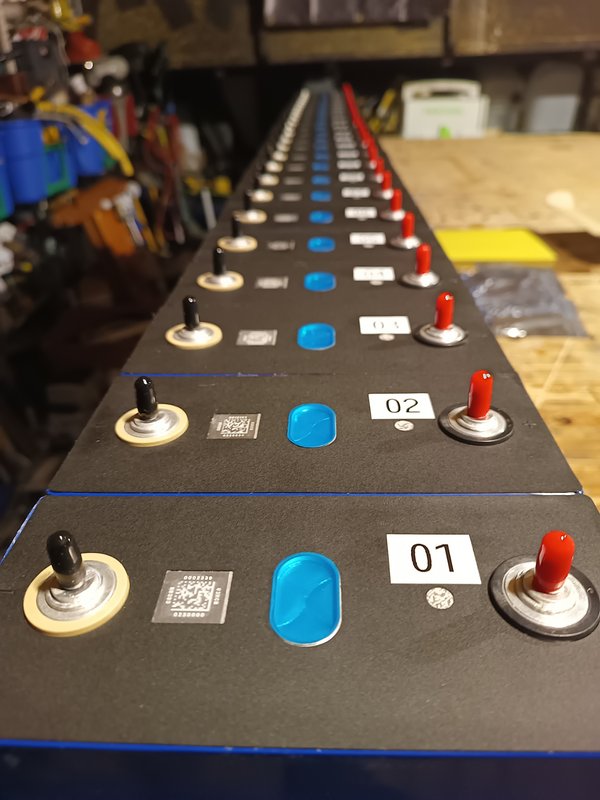
Numbering up, so I can track them.
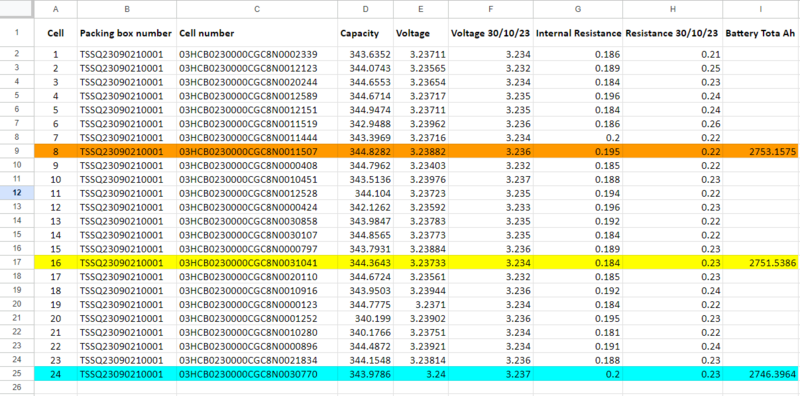
I took the data from the test report and then tested for Voltage and IR myself both looked good. One thing I was disappointed with was that the original test report they sent me, showed 6 month old cells, what arrived was over a year since manufacture cells, they still seem good, but I didn't get a reason why, and they did send me the correct test report when I queried it.
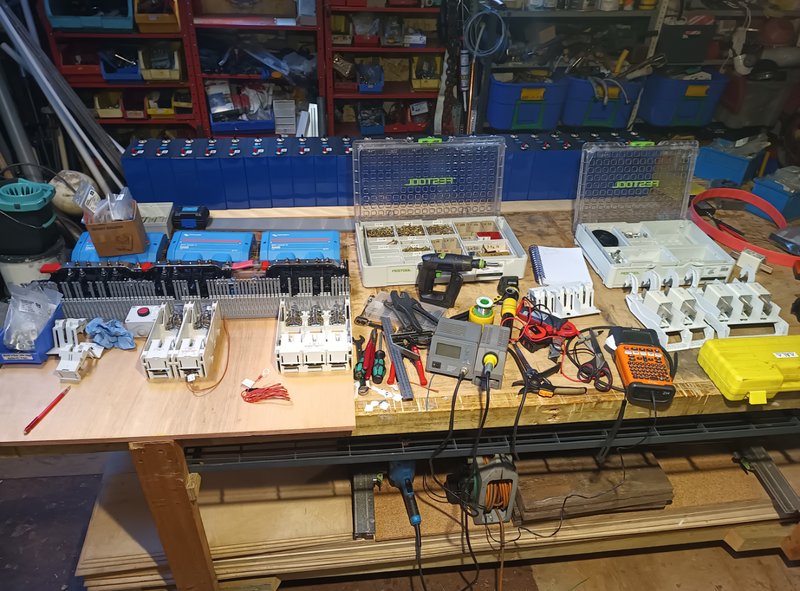
While waiting for the boxes, I needed to do some prep for the swap over from lead to lithium.
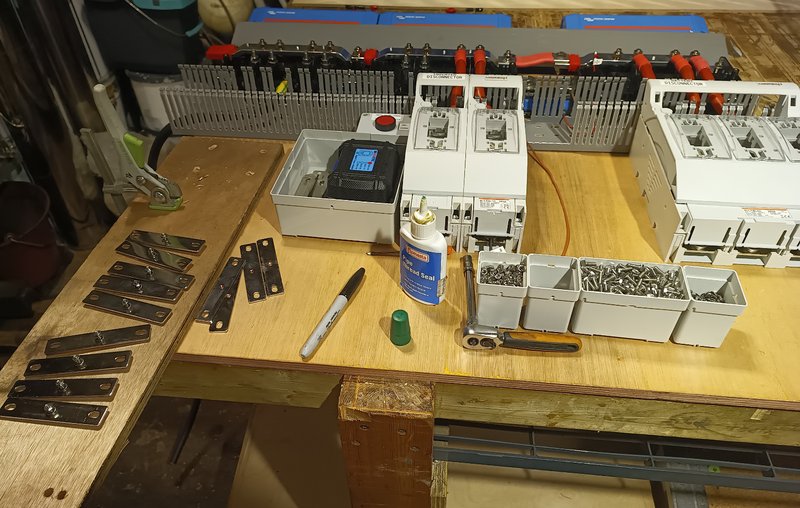
I tapped and thread locked with 4mm bolts on the busbars for the balance leads, to keep them separate and minimise stacking lugs on the terminals.
Figuring out how to squeeze the temporary busbar panel board in place, around the old bank panel before I remove it. I wanted to run both battery banks in parallel, but only charging the new batteries, by disabling discharge to see how balanced they were before switching over to them. It did sort of work, but tbh lead and lithium aren't the best of friends.
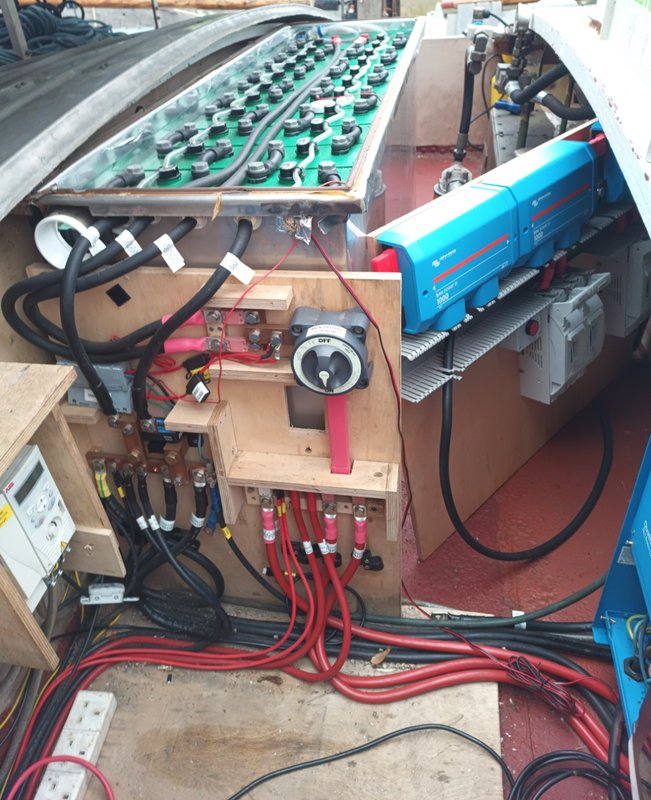
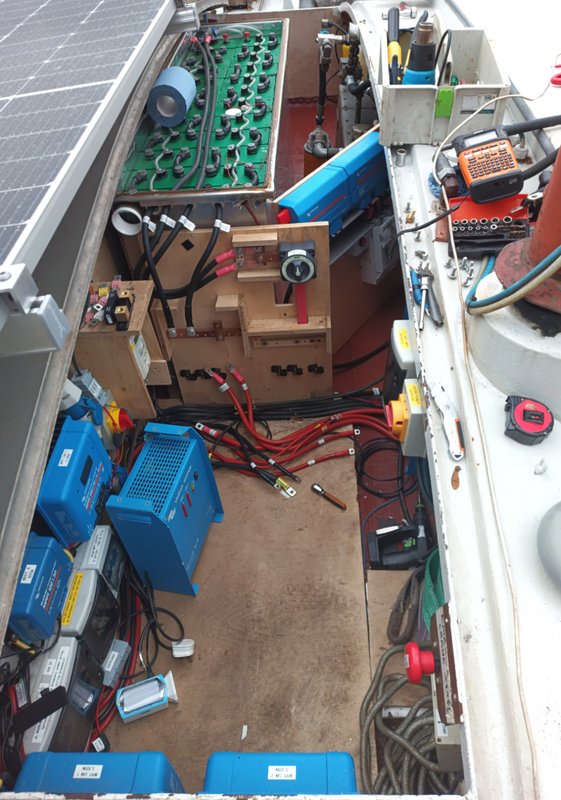
It's a tight fit in the battery chest! - lots of solar and Victron stuff in there, 3 phase Inverter drive, and 3000w 24v crane hydraulics too.
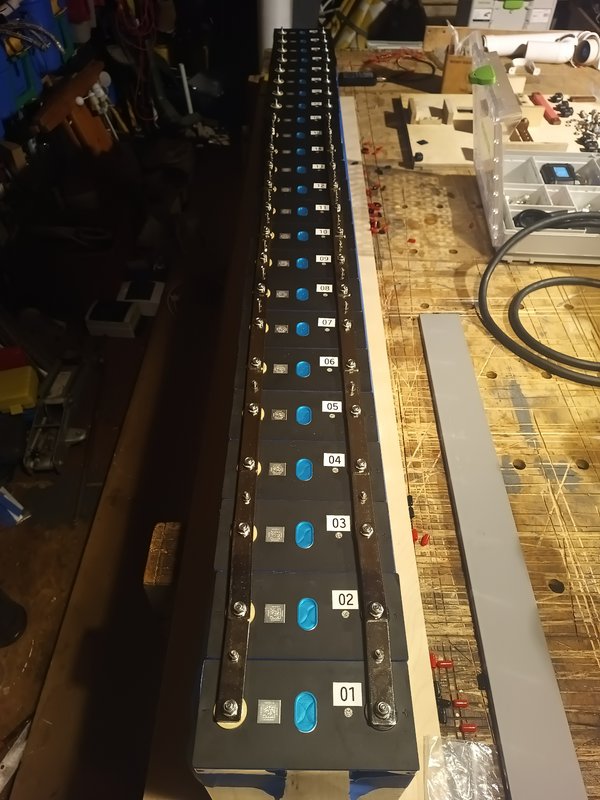
Whilst waiting I decided no harm in just paralleling the cells, I left them for 4 days or so and then swapped over to the other end of the row.
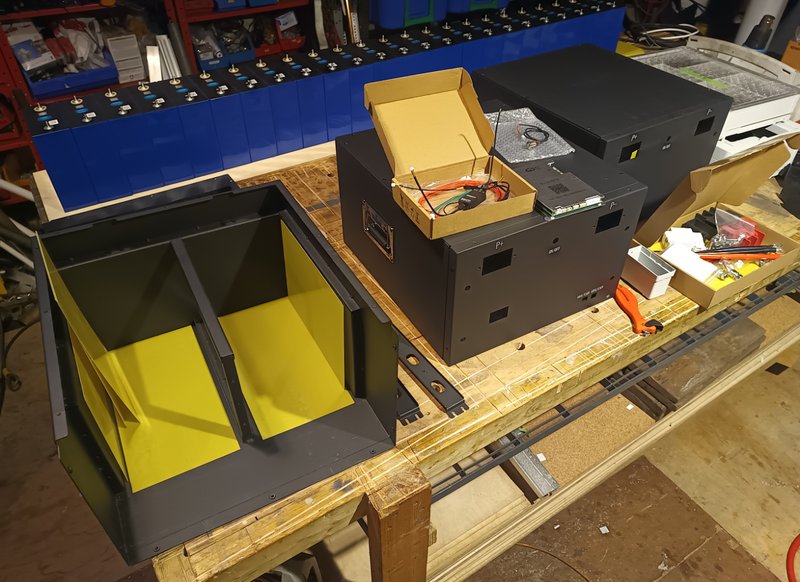
Battery boxes came, I assumed it would be simple to put them together, but with no instructions, I had to trial and error which way round for mounting everything so it would work. I ended up playing hokey cokey with the cells a few times, as I was also trying to see how best to shimmy the epoxy separator panels around.
I got the cells in!, Starting to look like batteries.
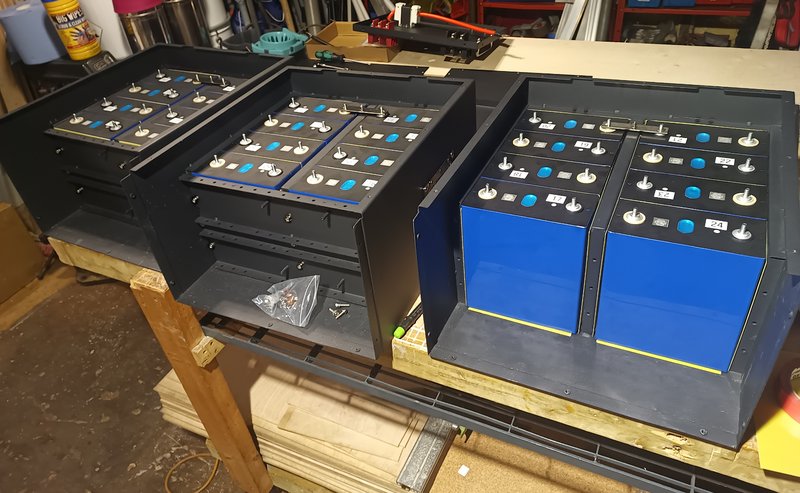
I had pretty much put them together before realising the last box had half the cells the wrong way around lucky no sparks! but it was late and maybe a beer or two had been involved..
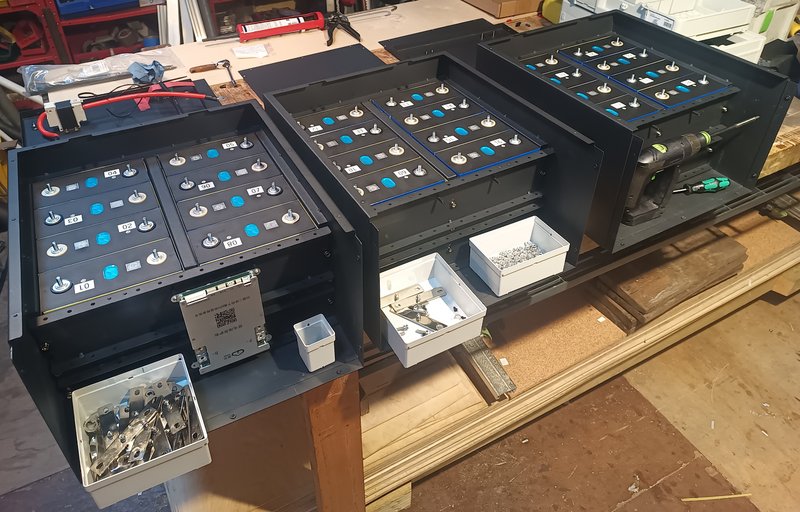
The JK Bms mounts upside down for access to the connectors
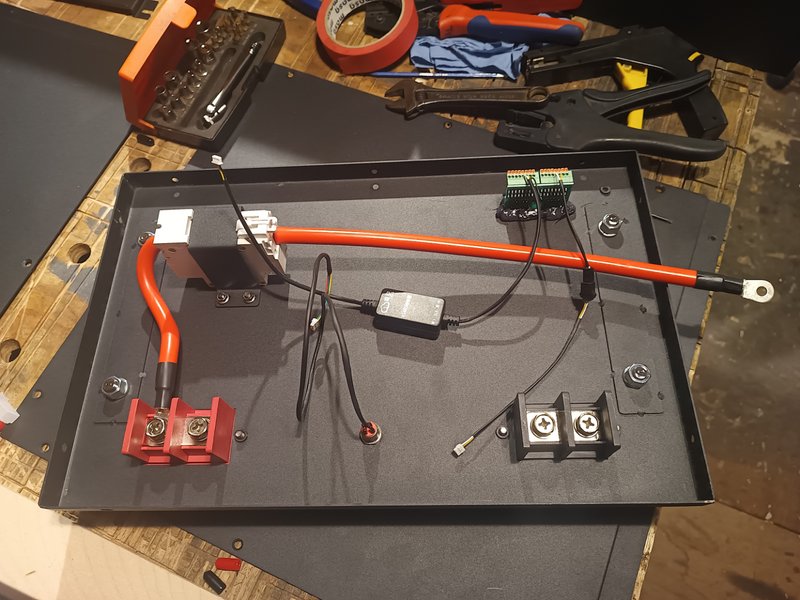
The back of the front panel
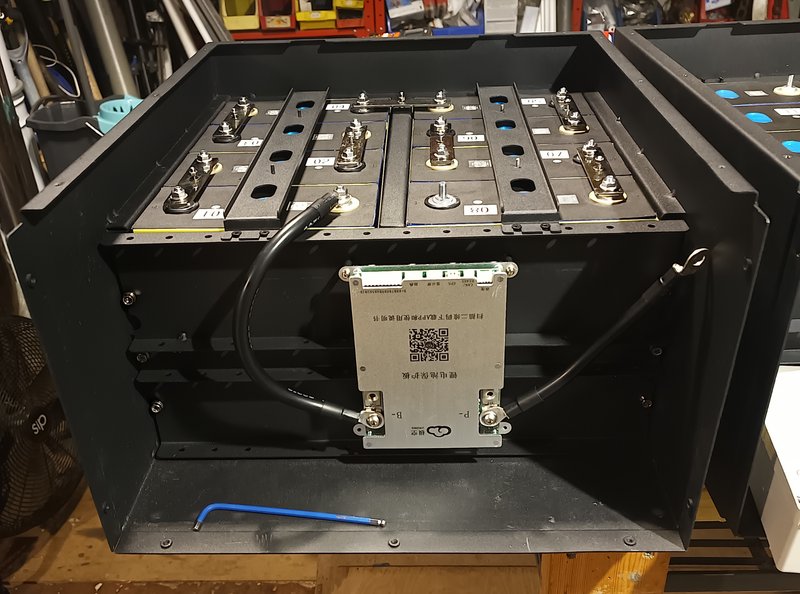
Busbars on, and all torqued to 4Nm. With a nifty digital 2-30nm torque wrench adaptor.
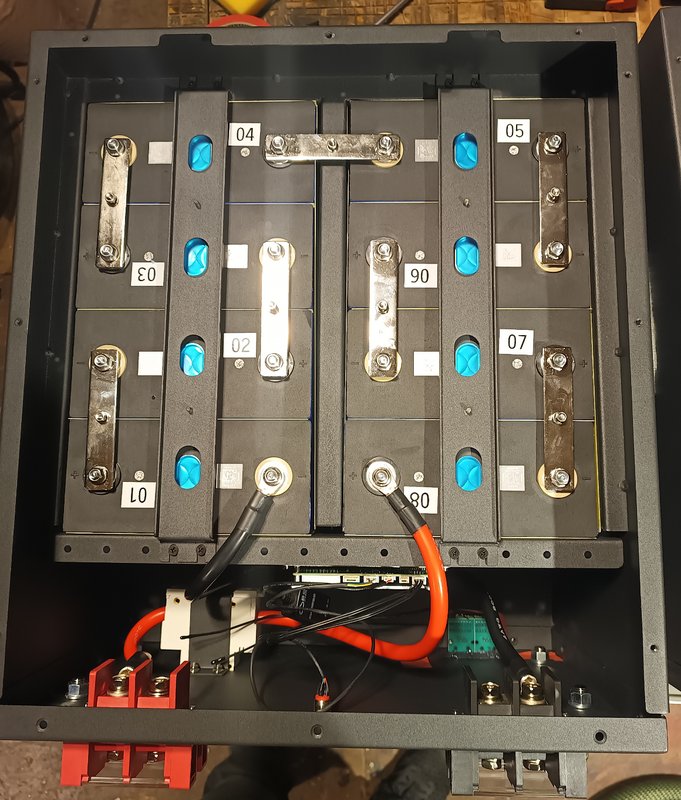
Balance wires all mounted and cut to length, tested then double checked before plugging in.
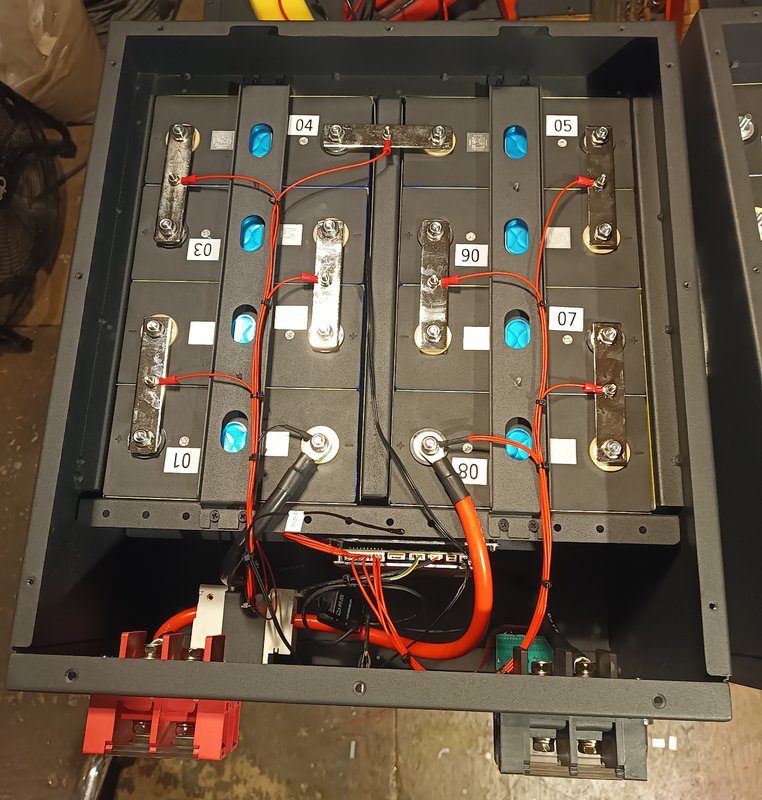
Not really a compression plate, but it will keep some pressure on the cells and stop them moving or bulging much it I ever over charged them.
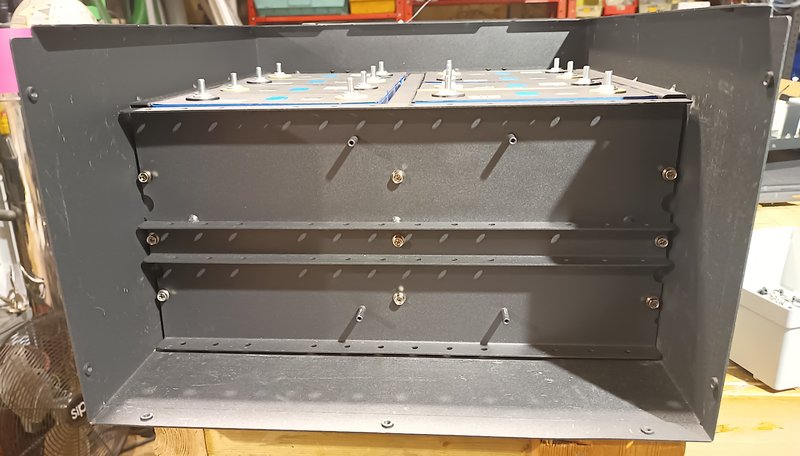
Coming together, one done next two to do.
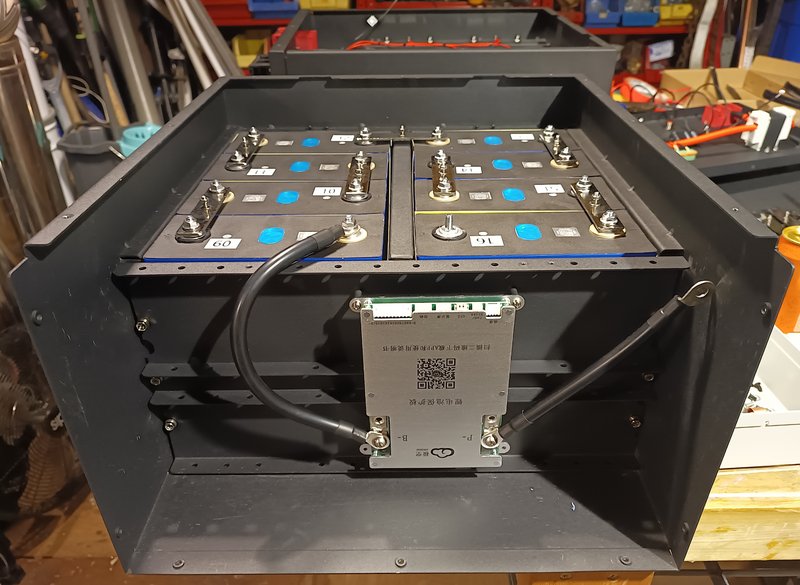
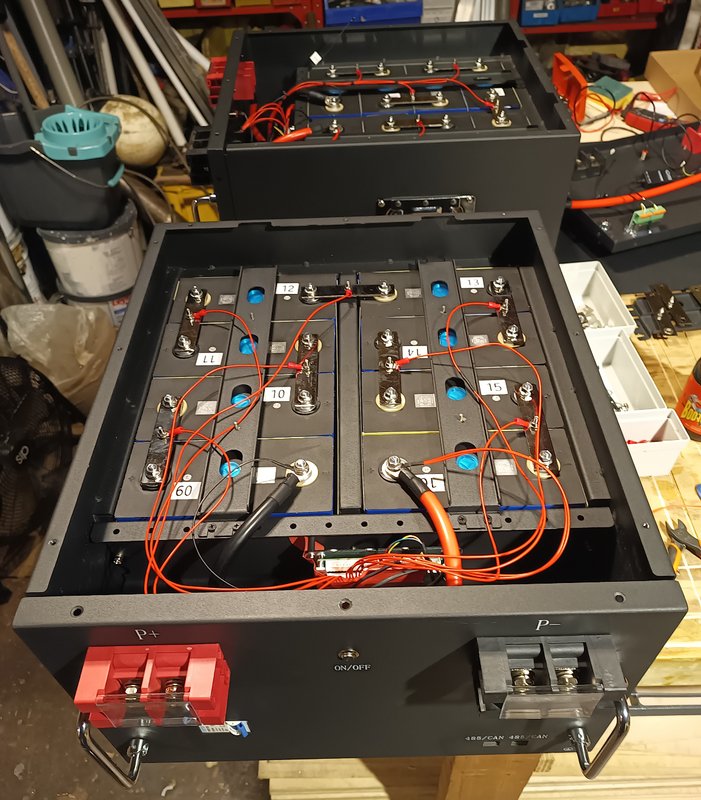
Bit of spaghetti
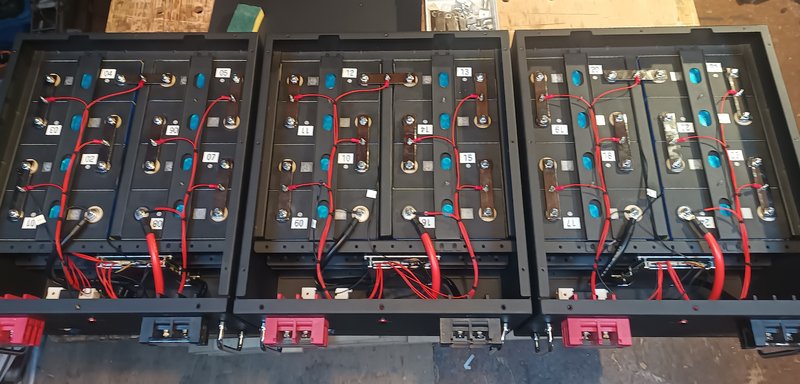
Three almost done
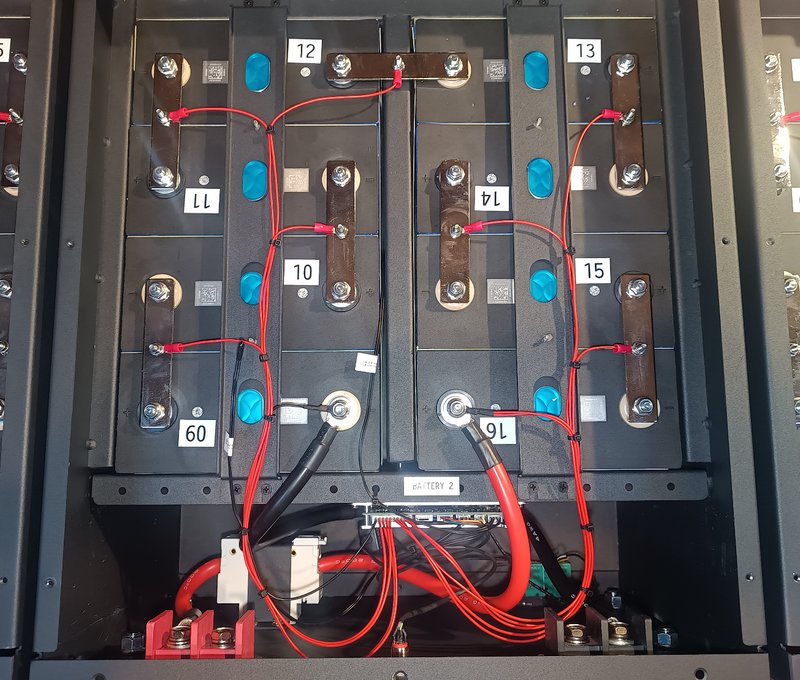
close up
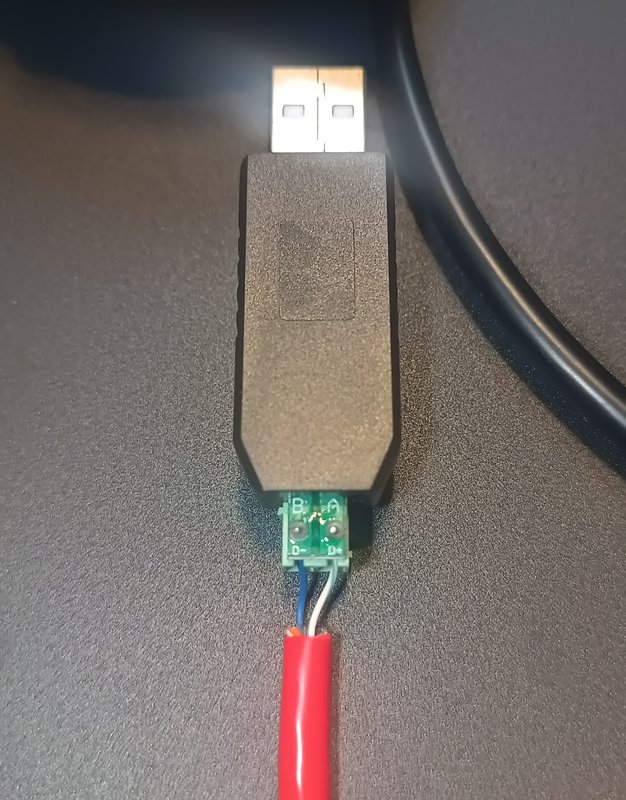
I got the JK BMS and their 'RS485' adaptor to talk with Victron, but actually, it's just ttl and i could have just got a ttl to usb alone, but I got some cheapo RS485 adaptors to talk to the RS485 adaptors, which then plug into the Victron Cerbo GX (I stupidly didn't use a twisted pair as I'd already wired the RJ45 port to the wrong pins.. turns out it does work, but I had some issues with noise on the first USB extension to Cerbo.
I also had to make up a load of exactly the same length cables, for the Victron Quattro to bussbar and for all three battery banks to bussbar, so they don't fight each other.
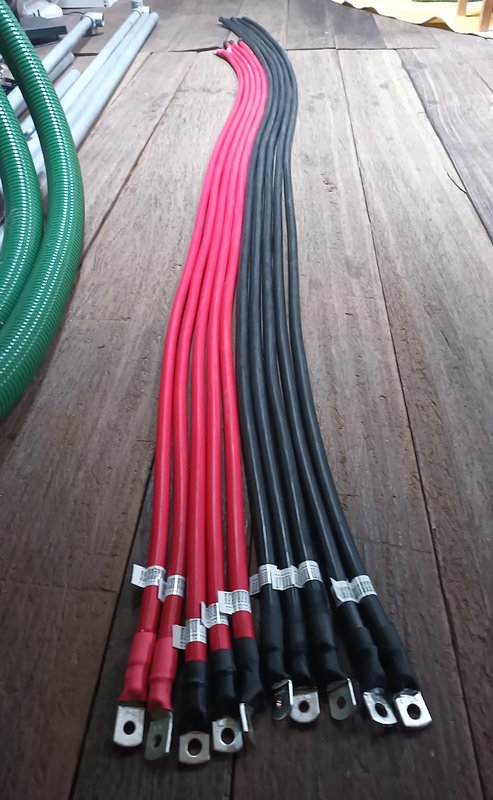
Sometimes / often.. in winter you just have to put the genny on, watch the power coming in and have a beer.


I also made a flat pack wooden box and front door for the batteries with insulation, as the overall battery chest for all the gubbins isn't sealed or fully insulated.
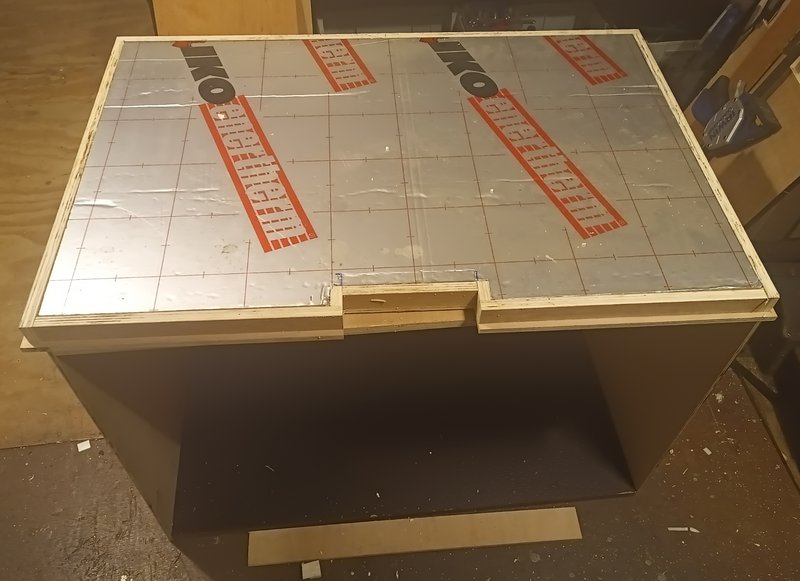
Door panel with bottom gap for the cables
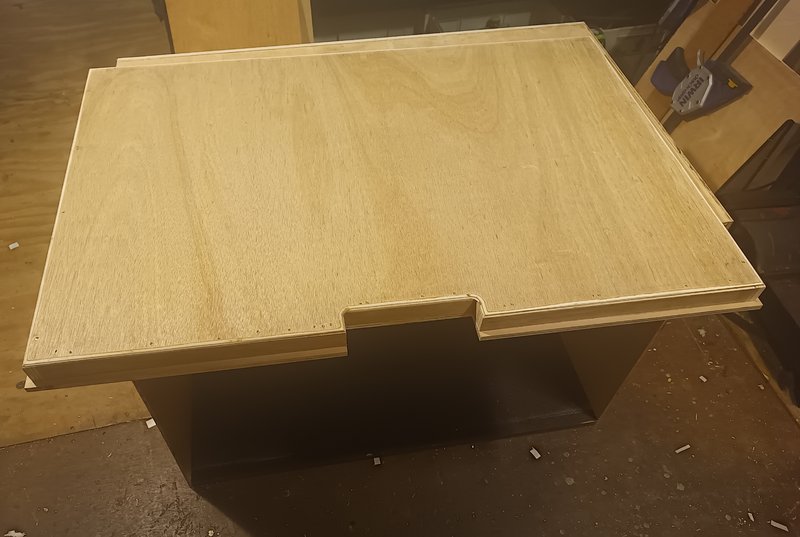
Offering up the insulation, as I had to then take it all apart and build it in an awkwardly cramped space amongst the old battery bank and all the other old bussbar and breakers etc. - In my head, planning the space was bigger than it actually was!
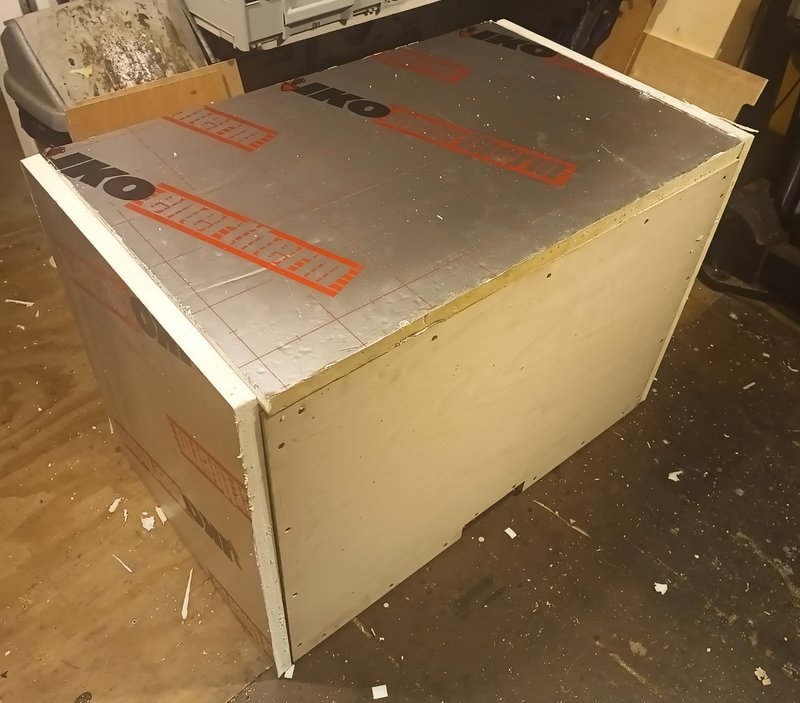
I weighed the finished boxes, 66kg each! Three on the dolly board to get them out the workshop, then my partner helped me get them up the stairs, and into the main battery chest.. my arms ached after that! I could have craned them out, but that would have been easy.
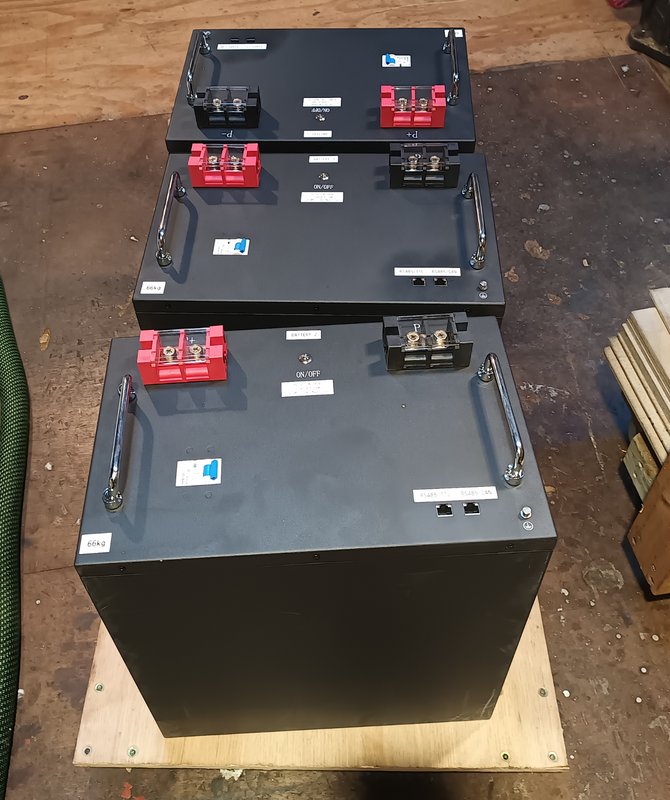
Working late into the dark sometimes didn't stop progress, or starting straight on it the next day, it's funny how when in a flow, sometimes projects like this are weirdly fun, and hard to stop thinking, making, doing, buying, organising, planning, dreaming everything all hours of the day.
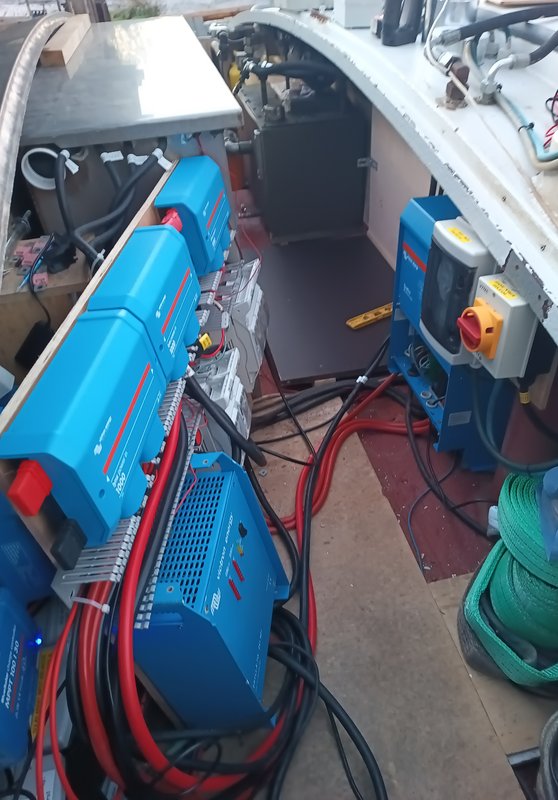
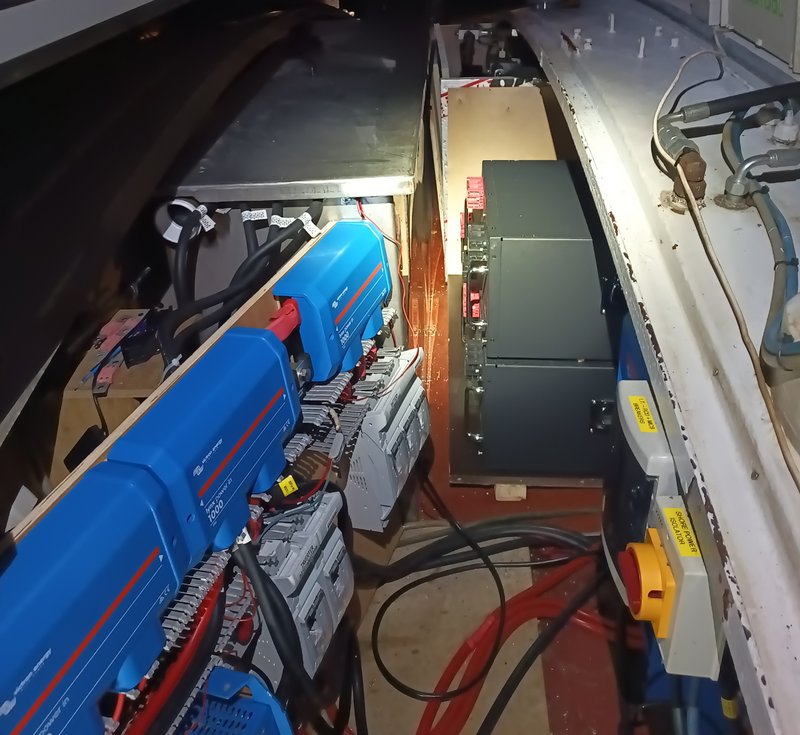
Well they just about fitted, before putting the side panels on, phew.
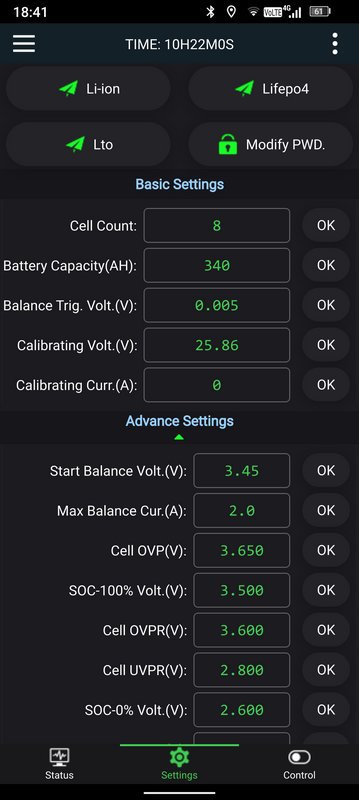
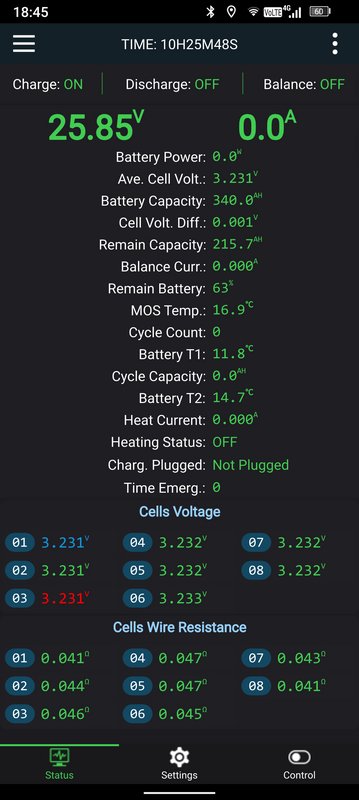
Finally for now, I got the JK app running, programmed the cut-offs etc
The cells were all very close in voltage and SOC before even starting to charge them. It turned out charging for the first time, I managed to get to 27.9v when my target voltage was 28v (3.5v / cell) with only around 30mv deviation, and around 15 mins absorption, so pretty damn good with no top balance and new cells.
I should try and get some photo's once it's all tidied up, but I still need to remove the old battery and box over the next few days
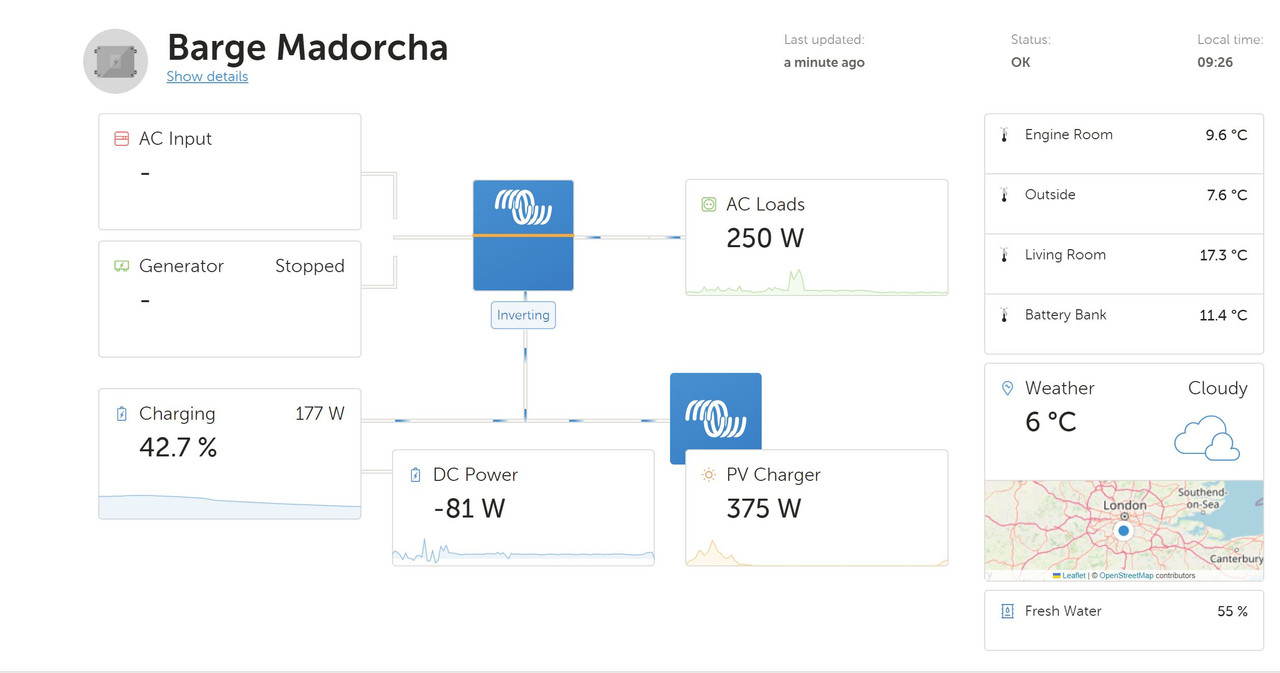
I might add a bit more detail about how they're running now on the Victron system, which is working great, with cell level detail accessible anywhere with internet, but it was a massive faff to get them to talk nicely! Although now they're all showing up and able to tell the whole system what they/I want , along with alarms.
I'd say I'm pretty happy so far, with both the cells and boxes, but it's only a bit over 24h since switch on, I'd like to do a full capacity test with the SmartShunt, as I'm not sure how accurate the JK BMS's are, and I've not calibrated them yet, either way not really a problem, especially as I have both to compare, and it's the hard knee voltage limits to worry about, but for now I'll just keep an eye on it..
It's here: (The advanced tab has the pretty graphs)
https://vrm.victronenergy.com/installat ... e/c76c4bf6
After reading Joeboys thread Idiot's guide to a self build battery, I thought great, now is my time!
Although It took 72 days from ordering for the Gotion 340ah cells to arrive and 93 days for my Battery boxes to get here, but two weeks of that was stuck in felixstowe.
I used Gobelpower for the cells and Shenzhen Luyuan for modifying battery boxes for them (They're larger than standard 280-304 Ah cells) both were on Alibaba (credit card and DDP important), they're two of the well regarded sellers for real grade A cells with full test reports. But please read here, or other online forums for up to date trustworthy sellers if anyone reads this on my word alone. Many suppliers will re-laser the barcode on a 'grade B' cell and re-sell as grade A. Ask to see the test reports, and then double check with the Gobelpower universal QR checker https://www.gobelpower.com/lifepo4_decoder.html, or the LiFePoQR app https://play.google.com/store/apps/deta ... =web_share to check your barcode.
Luyuan couldn't get the larger Gotion 340Ah Cells, which I ended up getting from Gobel for £2,940 ($3,612) DDP. If I had gone for 280 / 304's I would have considered it though. Docan also had 340Ah cells but they're known to have sold re-lasered grade b as grade a, as well as grade a, so hit and miss..
Price for the modified boxes was £792 DDP to UK. ($967 USD) So £264 per box with JK BMS RS485/CAN connector ETC but also no Screen, I'll be connecting to Victron so don't need it.
So 3 x Battery boxes @ 26kWh total for £3,732 / $4,579 Delivered (Caveat, I think I've now spent way too much of my free and not so free time prepping and building all of this, so maybe not a great option if you don't have any time to spare!
After the long wait and prepping for them, the cells arrived first, but I didn't have enough busbars to balance them all, and actually, top balancing is only necessary for low grade, random batch or fake cells.
All the data sheets from manufacturers now specify an absolute minimum termination (tail current) at 0.05C, so 14a for a 280ah cell, top balancing as is common below this will damage LFP cells. Basically if they're decent cells, and you have a good BMS or active balancer it shouldn't be necessary.
Anyway, pictures!
Cells arrived! 1,088Wh each x 24 for three 8.7kWh 8S 24v batteries @ 26kWh total storage.

They were well packed, with UN codes for batteries, and DDP all taxes paid.

Numbering up, so I can track them.

I took the data from the test report and then tested for Voltage and IR myself both looked good. One thing I was disappointed with was that the original test report they sent me, showed 6 month old cells, what arrived was over a year since manufacture cells, they still seem good, but I didn't get a reason why, and they did send me the correct test report when I queried it.

While waiting for the boxes, I needed to do some prep for the swap over from lead to lithium.

I tapped and thread locked with 4mm bolts on the busbars for the balance leads, to keep them separate and minimise stacking lugs on the terminals.

Figuring out how to squeeze the temporary busbar panel board in place, around the old bank panel before I remove it. I wanted to run both battery banks in parallel, but only charging the new batteries, by disabling discharge to see how balanced they were before switching over to them. It did sort of work, but tbh lead and lithium aren't the best of friends.

It's a tight fit in the battery chest! - lots of solar and Victron stuff in there, 3 phase Inverter drive, and 3000w 24v crane hydraulics too.

Whilst waiting I decided no harm in just paralleling the cells, I left them for 4 days or so and then swapped over to the other end of the row.

Battery boxes came, I assumed it would be simple to put them together, but with no instructions, I had to trial and error which way round for mounting everything so it would work. I ended up playing hokey cokey with the cells a few times, as I was also trying to see how best to shimmy the epoxy separator panels around.

I got the cells in!, Starting to look like batteries.

I had pretty much put them together before realising the last box had half the cells the wrong way around

The JK Bms mounts upside down for access to the connectors

The back of the front panel

Busbars on, and all torqued to 4Nm. With a nifty digital 2-30nm torque wrench adaptor.

Balance wires all mounted and cut to length, tested then double checked before plugging in.

Not really a compression plate, but it will keep some pressure on the cells and stop them moving or bulging much it I ever over charged them.

Coming together, one done next two to do.

Bit of spaghetti

Three almost done

close up

I got the JK BMS and their 'RS485' adaptor to talk with Victron, but actually, it's just ttl and i could have just got a ttl to usb alone, but I got some cheapo RS485 adaptors to talk to the RS485 adaptors, which then plug into the Victron Cerbo GX (I stupidly didn't use a twisted pair as I'd already wired the RJ45 port to the wrong pins.. turns out it does work, but I had some issues with noise on the first USB extension to Cerbo.

I also had to make up a load of exactly the same length cables, for the Victron Quattro to bussbar and for all three battery banks to bussbar, so they don't fight each other.

Sometimes / often.. in winter you just have to put the genny on, watch the power coming in and have a beer.

I also made a flat pack wooden box and front door for the batteries with insulation, as the overall battery chest for all the gubbins isn't sealed or fully insulated.

Door panel with bottom gap for the cables

Offering up the insulation, as I had to then take it all apart and build it in an awkwardly cramped space amongst the old battery bank and all the other old bussbar and breakers etc. - In my head, planning the space was bigger than it actually was!

I weighed the finished boxes, 66kg each! Three on the dolly board to get them out the workshop, then my partner helped me get them up the stairs, and into the main battery chest.. my arms ached after that! I could have craned them out, but that would have been easy.

Working late into the dark sometimes didn't stop progress, or starting straight on it the next day, it's funny how when in a flow, sometimes projects like this are weirdly fun, and hard to stop thinking, making, doing, buying, organising, planning, dreaming everything all hours of the day.

Well they just about fitted, before putting the side panels on, phew.

Finally for now, I got the JK app running, programmed the cut-offs etc

The cells were all very close in voltage and SOC before even starting to charge them. It turned out charging for the first time, I managed to get to 27.9v when my target voltage was 28v (3.5v / cell) with only around 30mv deviation, and around 15 mins absorption, so pretty damn good with no top balance and new cells.

I should try and get some photo's once it's all tidied up, but I still need to remove the old battery and box over the next few days
I might add a bit more detail about how they're running now on the Victron system, which is working great, with cell level detail accessible anywhere with internet, but it was a massive faff to get them to talk nicely! Although now they're all showing up and able to tell the whole system what they/I want , along with alarms.
I'd say I'm pretty happy so far, with both the cells and boxes, but it's only a bit over 24h since switch on, I'd like to do a full capacity test with the SmartShunt, as I'm not sure how accurate the JK BMS's are, and I've not calibrated them yet, either way not really a problem, especially as I have both to compare, and it's the hard knee voltage limits to worry about, but for now I'll just keep an eye on it..
It's here: (The advanced tab has the pretty graphs)
https://vrm.victronenergy.com/installat ... e/c76c4bf6


