We opted for an external battery shed, on the site of the old 1000L oil tank that the neighbours son was happy to take off of my hands.
This occupied a nook in the garden, and was juat a bit bigger than 8x4.
We decided, from a maintenance and fire viewpoint it would be better to have a metal shed than wooden, thinking it would also be less hassle, faster and cheaper to build than a brick shed, which i would have preferred.
We lifted the slabs that the 1000L tank was sitting on and found compacted gravel, so decided against digging footings.
Opted for a 3-4inch thick reinforced slab at 8:1 ballast mix. Overkill but we had a whole bag of ballast to use.
Cement mixer hire was £15 for the day, delivered.
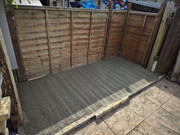
In no time we had the foundation laid.
Next was time to make the shed up which was more fiddly than i envisioned as it came in easy to ship small panels.
Cant find the photo, but you know what a shed looks like.
The initial electrician came round and said we would need to put 18mm ply up on the back wall, then cement board over the top of that for the inverter to sit on.
I was not aware we needed both, but that was the standard he was happy with.
So with that in mind we decided to insulate the entire shed first then line the entire lot with ply.
We could have opted for rockwool straight away but decided it better to spray foam first to reduce chances of condensation on the inside of the metal where it undulates.
We used penusol spray foam which isnt cheap, but comes with a fan nozzle for getting a decent spray rather than a bead.
This had the added benefit of stopping that metal shed noise that i disliked so much about our old shed in our old house. You could never opwn and close the shed quietly.
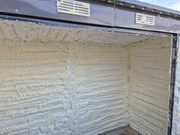
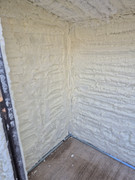
From there the plan was to build a frame for the inside of the shed, and add rockwool, then a vapour control layer.
As a dpm we put down the plastic floor protectors you can get from b@q.
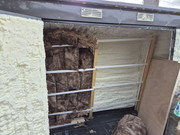
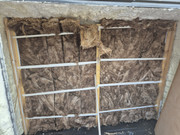
We then set about building an entire ply shed inside the metal shed, and got part of the way through that when the batteries and battery boxes arrived.
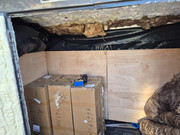
I then set about making up the batterys
The cells were sourced by Colin, EVE 280's (thanks colin they are excellent)
And the battery boxes were sourced from Gobelpower, after having an initial battery box purchase via ali express partially refunded, despite them sending the ordered BMS and screens anyway.
Given we can see -14C temps here in winter i opted for heater pads in each box. These most likely will not be used, but at an extra £11 per box it was a no brainer for peace of mind.
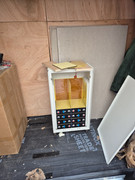
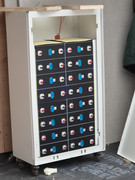
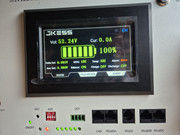
The Gobel boxes with the JK BMS did not come with a display. they have now changed this to have a smaller display, but i wanted one, and had some from the ali express bms order, so set about adapting the front plate to accept a 4.3" display.
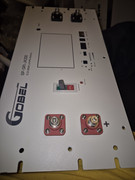
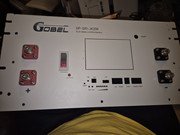
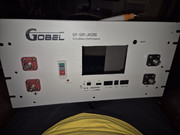
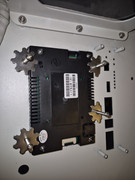
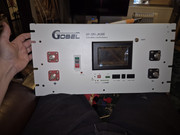
From there i could finish assembling the battery cases.
I am impressed with the quality of these boxes, despite small issues.
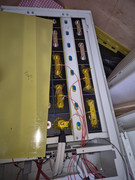
Andys Garage has gone into detail about these boxes and the issues he has found regarding holes not lining up.
Out of 3 boxes, only 1 had this issue, and it had been beaten up a bit, with slight bends and knocks visible on the case upon opening.
Gobel were quick to respond to this issue and gave me a partial refund due to the issues with this box.
With a bit of persuasion, i managed to get most of the screws in, but failed with some for the main cover where these were not even close. The cover is on and secured, with no holes, so that is good enough for me.
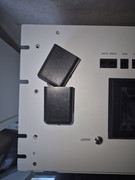
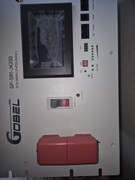
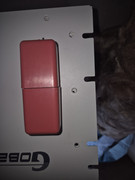
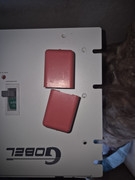
And after initial hold your breath and hope for no smoke
We were good.
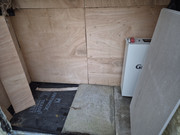
Back to the shed, to my pleasant surprise, the slabs lifted from underneath the oil tank fitted perfectly in the shed once the ply lining was in place.
I love it when things just puzzle together with no planning.
I had enough of these to do the entire shed floor, which will add to thermal mass, seperated from cold and wet by the dpm.
It wasnt long however until the next problem turned up.
On trying to move one battery from one shed to the battery shed, one of the wheels fell apart.
Of course i was doing so on a day where i was alone in the house. I couldnt leave the unstable battery to go and get anything to prop it up, or the crane to lift it into the shed, as the 140kg box would have fallen and done more damage. So with 3 wheels i had to try and balance the box in order to wheel it closer to the shed.
Then a second wheel fell off, and a 3rd.
I then had to try and kick the 4th off to allow me to set it down to move.
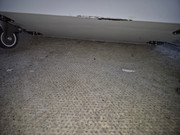
I used the crane for the third battery transfer, but upon moving this into position in the shed, another wheel fell off
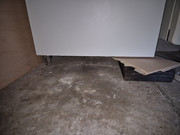
Gobel once again responded within an hour, apologising for the quality of the wheels and sending out replacements. They once again refunded some of the money for the damage to the paintwork on the boxes.
I then put some white nail varnish over these exposed metal areas to protect the cases as best as possible.
And then it was back to putting the shed together.
With the ply finished the 12mm cement board for the back was put on, and bolted all the way through the shed for stability.
We then decided we may as well line the rest of the shed with cement board to increase fire resistance. Unnecessary for regs, but better if there ever was an electrical fire in there.
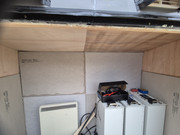
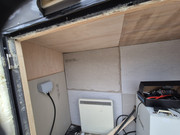
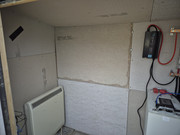
After one electrician pulling out due to the remedial works, we then had a task to find someone else willing to do the initial connections.
In the mean time i threw up some cables, fuses and a charger on the wall to keep the batteries topped up and balanced whilst we waited. I figured the electrician we had found would change this or move to his preference so didnt care what it looked like on the wall as long as it was neat ish.
Cables are 50mm2. Borrowed from boat supply.
Fuses 120A
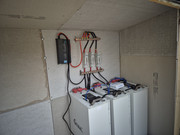
It was then time to think about how the cabling was going to get to the shed.
Had i of thought about this when i poured the slab, i wouod have left an area for the cables to enter under the shed. Now, to have a neat install outside of the shed, i had to drill through the slab, and hope i missed the rebar!
As luck would have it i got it right first time.
We were now into winter and had to dig a 10m trench for conduit then drill through the house wall to connect everything up.
We did think about leaving this to the electrician, but as we were waiting on everything anyway thought we may as well save the electrician time and effort.
Planned route with tee off for planned solar cabling
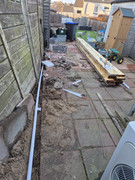
Route under the house at an angle to the wall.
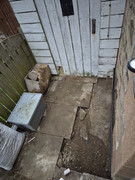
After 2 hours of drilling, 5 extension bits for the drill, and 3 core bits, we were finally through. The walls are 50cm thick, and apparently made of stone harder than diamond.
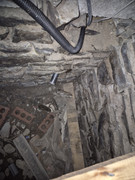
And then we were on to install day.
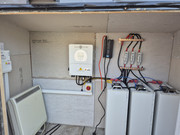
We decided for 2x3.6kw sunsynk eccos in parallel.
1 year ago when this project started, we were told G99 applications were a matter of weeks.
Now it is months wait.
So we opted to split things. Do a g99 fast track and install 1 3.6 now to get up and running ASAP,
And also put in a full g99 for the second inverter.
If we were told no, then the existing g98 solis solar could be swapped for a sunsynk to get the parallel that way.