Extraflame renovation
Posted: Wed Jan 15, 2025 10:09 pm
Might be of interest to some people:
Until recently, we heat our home with 1 x 12kW pellet boiler and 1 x 8kW pellet room stove (with a couple of woodstoves for backup). In very cold weather, it isn't quite enough, and the temperature slowly drops if we have prolonged cold weather. So last autumn, I bought a second hand Extraflame pellet boiler for £500 'in perfect working order' (We'll see about that!).
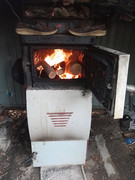
The plan was to fit this in place of the Lohberger pellet cooker which I installed a few years ago (without any doubt, the very worst stove I have ever seen - multiple design faults).
Towards the end of the summer, I started putting in the 40metres-ish of 22mm pipe to connect it up to the rest of the central heating system. No mean feat, as flow and return had to pass through two solid stone walls- one almost a metre thick and the other about 50cm - a job I had not been looking forward to.
I rerouted the exhaust through the side of the stove so that it could use the existing flue pipe which exits through a glass roof - something that I didn't want to have to move!
Most pellet stoves consist of three active components - an auger motor to feed the pellets, a fan to suck the exhaust gases out and an ignitor....plus a few safety cut-outs for pressure/over temperature etc - so they're not as difficult to repair as you might think. When I connected it up, the pellets fed, but no ignition - so I checked the ignitor - failure. This was probably the reason that the original owner sold it to me ('perfect working order' remember!). Luckily, it's a cheap fix. There are plenty of aftermarket ignitors and generally the differce is 1)Length - although you can often get a shorter one to work 2)Fixing - some simply slide in, some are fixed with a allen-headed grub screw, and some are either screwed on a large concentric nut, or they have small bolts to screw down a flange - either way, you can often get a cheap £20-30 alternative to replace the £200 OEM part. Ignitors should be considered consumable, so it's worth having a spare one for when you need it.
Luckily the auger on this machine was ok - but it's worth measuring how many rpm the motor is, so that if it fails, you know what to replace it with. Again these tend to be generic - you just need to know which way round they spin (a lot are reversible), what diameter the shaft is and how many rpm. If you can match the torque as well, that's a good idea too. Generally, auger motors will set you back £60-120, and again, can be considered as a consumable item. You'll probably get 3years maximum out of an auger motor, if it's used as the main source of heating ie run daily.
One unexpected problem I encountered with this machine was an error message relating to water under-pressure. It seems that these were designed to run as unvented systems, so expect a pressure of a few bar minimum. That's not compatible with my 3 floors of gravity feed (c. 3/4 bar), so I looked up the sensor (it's a voltage sensor) and checked the supply voltage from the PCB. I then used this info to guess at a suitable voltage divider circuit - ie two resistors in series, to provide a reference voltage in the range it would accept. A little trial and error, and I came up with something that keeps it satisfied.
Next job was to fix a few internal leaks - I think it has fibre seals on some internal components which have been dry for an extended period - so these needed tightening slightly.
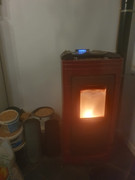
The stove fired up ok, and was soon producing heat. This stove is slightly different from most I've worked on before - most stoves seem to rely on a strong flow of air blowing the ash out of the burn pot which then falls through a grate which surrounds the burn pot, and into an ash collector below (or, in fact, most of them blow a fair percentage of the ash up the chimney, so it accumulates in any bends and may require a fair bit of stripping down to access and remove the fly-ash). So this one basically burns for a set period of time (2hours or so), then allows the fire to burn out, winds the floor of the burn chamber out of position to dump any ash, then reinstates it, and runs an ignition cycle again. This means every now and again, it stops producing heat for 15minutes or so, and it means extra wear-and-tear on the ignitor, but some manufacturers seem to think this is a better option especially on higher output machines. The downside with mine, is that when it does so, it comes up with an error message telling me that the Burn Pot Motor has jammed, and that requires a reset - turn machine off, turn it on again - approximately 1/2hour. I put up with this for a while whilst I tried to decypher the settings which don't seem to be documented too well. Turns out there is an option to change the frequency of the burn pot emptying - so I increased it to the maxium frequency - and this solves the problem. It was on the default setting, so useful to know if anyone else has a problem with extraflame burn pot error messages.
Finally, I found a trim setting that allows you to change the pellet feed by +/-20% - so this was increased to the maximum +20%, which takes the stove up to a maximum output of around 27kW. This has just been tested with our coldest period since the stove was installed: nights of -5 to -7C and daytime temperatures of -3 to 1 C for about 5days, and it was perfectly adequate to keep our house warm when running from around 7am to midnight - so considering that previously, we'd be rather cold under those conditions, I think it can be considered a success.
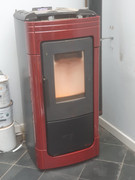
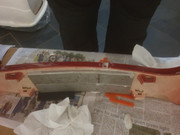
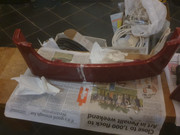
I plasma cut a hole in the one side panel when the exhaust is now routed, then repaired 4 out of the 5 ceramic stones (one more left to do). These had been accidentally smashed because the outdoor bench that they'd been sat on for a few months collapsed. I used PU woodglue to glue the cracks together, and then reinforced it with some thick ali plate glued onto the inner surface with more PU woodglue. Carefully shaved off the excess glue with a stanley knife blade then used a coloured sharpie to colour in the pale line of the crack. You can still see it close to, but if youre standing more than 2feet away, you wouldn't realise it had been broken, unless I told you. The PU glue seems good for the kind of temperatures that the water jacket achieves and doesn't seem to soften at all.
The only downside - it seems to quite happily chomp through 50-60kg of wood pellets per day, so there's a lot effort needed for keeping it topped up!


