I posted about this on the other forum but as that's gone someone asked if I could redo the write-up of my DIY heat exchanger & ventilation system, so here goes:
It's something I'd been musing over for a while and when lockdown started last year I thought it would be a good project to help keep me sane. The idea is based on an article from the 80's which you can still find online at https://www.builditsolar.com/Experiment ... DIYHRV.htm
There were also some useful discussions on www.ecorenovator.org which sadly seems to be no more.
I decided that a counter-flow design would be more efficient that the cross-flow one so worked out what I could get out of a few sheets of these plastic greenhouse panels and also what I could actually get up through the loft hatch. I came up with this design on the back of an envelope:
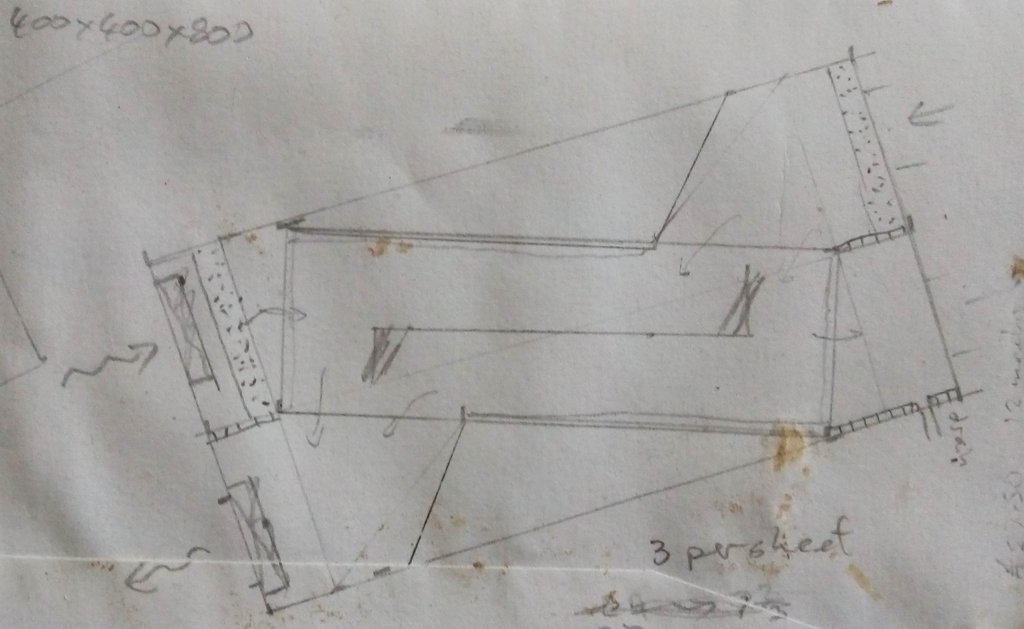
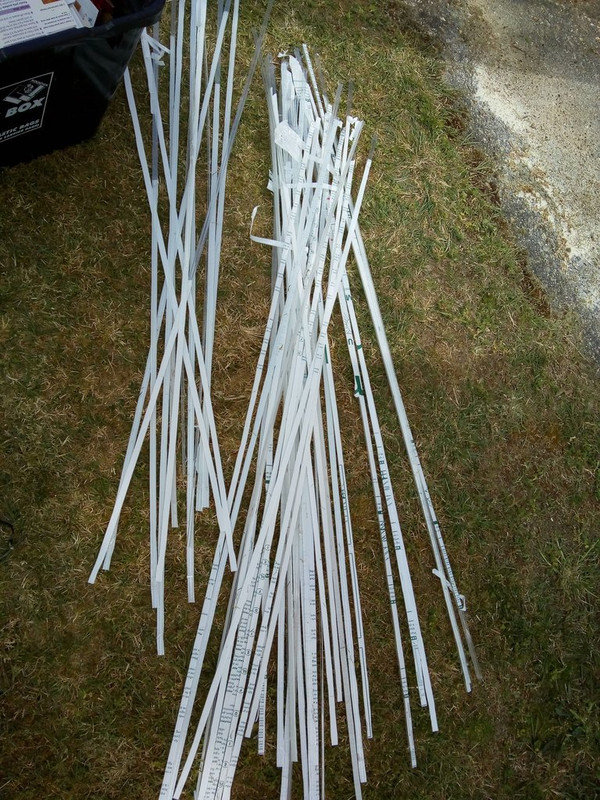
The idea is that air flows in one direction inside each of the twin-walled sheets which are spaced apart with thin strips and suitably sealed to allow air to flow in the other direction between the sheets. I also put thin strips as baffles down the centre between the sheets to better direct the airflow and to prevent sagging.
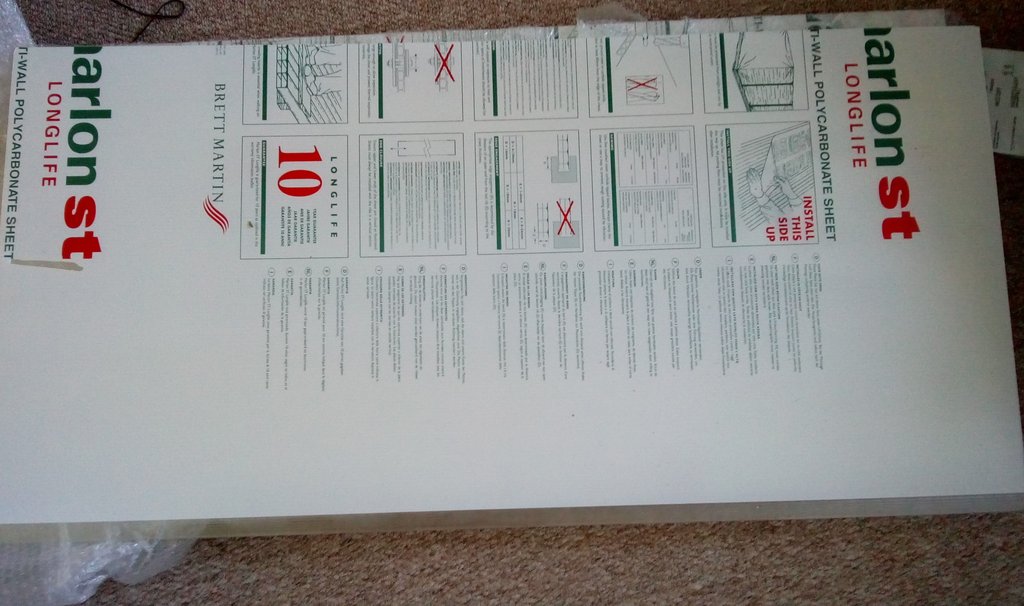
The sheets:
The cut strips:
The sheets are joined and sealed with sealant designed for polycarbonate windows on caravans and the like - this is really thick & sticky stuff and broke my first caulking gun (a metal one!), I think I used three tubes in the end.
The finished heat exchanger core:
I built a box out of the same plastic sheets as I had some left over anyway and I wasn't convinced about using ply with the condensation. There's a small pipe running from the bottom as a condensate drain - I spliced it into an existing overflow pipe in the loft. Bought some 120mm flexible ducting and fittings to connect it up and used a pair of high performance 12V computer fans to run it via a home-made PWM controller.
The (almost) finished product:
And installed in the loft:
-I've since put some insulation over it. The warm side ducting is burried under the loft insulation.
It extracts from the bathroom and feeds the main bedroom, I've definitely noticed the improvement in air quality upstairs. My house has good air-tightness upstairs (no trickle vents). Something this size isn't big enough to do a whole house but works well for a single room. I did try measuring air temperatures in and out, I can't be very exact but I'm guessing it might be as good as 90% efficient in heat recovery. The fans are only a couple of Watts at full speed.
Things to note if you're thinking of doing this yourself:
It's a lot of work -just squeezing out the sealant requires a lot of grip strength! There are a lot of layers and I could probably have got away with a slightly slimmer core for the fans I'm using. The fans are fine for the job running around quarter to half speed, I have a 'boost' button which runs them at full speed for ~15 mimutes but that's not really enough to clear steam or smells from the bathroom very well. I've been meaning to modify the controller to increase the boost to 30mins. max. - 150mm ducting would probably have helped the airflow. I can hear it at half speed or over but it's not intrusive - the M4 motorway is only a couple of miles away and that's often louder. I probably spent £120-£150 on it and you can buy one for £200-£300ish but it was a good project to do at a difficult time.
DIY MVHR
-
- Posts: 602
- Joined: Mon May 31, 2021 7:16 pm
- Location: ville of spiky things
Re: DIY MVHR
That's brilliant mate, with the amount of houses out there with dodgy ventilation and black mould all over the place, I reckon you have a fair business model in the making there
Desp
Desp
Blah blah blah
-
- Posts: 971
- Joined: Tue Jun 01, 2021 12:35 pm
Re: DIY MVHR
Second what spread says - why ‘positive’ ventilation is such an overlooked aspect of housing escapes me. Not just from a heat recovery aspect but, perhaps more importantly, health.
Unless I’ve missed it Stig, what did you do with condensation ? Presume there was condensate within the box ?
-
- Posts: 569
- Joined: Sun Jul 18, 2021 11:50 am
Re: DIY MVHR
Yes, you've missed it, check the text just below the complete HE coreBugtownboy wrote: ↑Sat Nov 20, 2021 4:12 pm Second what spread says - why ‘positive’ ventilation is such an overlooked aspect of housing escapes me. Not just from a heat recovery aspect but, perhaps more importantly, health.
Unless I’ve missed it Stig, what did you do with condensation ? Presume there was condensate within the box ?
Re: DIY MVHR
One of my faves from the old site. I continue to be amazed at this.Stig wrote: ↑Sat Nov 20, 2021 10:31 am I posted about this on the other forum but as that's gone someone asked if I could redo the write-up of my DIY heat exchanger & ventilation system, so here goes:
It's something I'd been musing over for a while and when lockdown started last year I thought it would be a good project to help keep me sane. The idea is based on an article from the 80's which you can still find online at https://www.builditsolar.com/Experiment ... DIYHRV.htm
There were also some useful discussions on www.ecorenovator.org which sadly seems to be no more.
I decided that a counter-flow design would be more efficient that the cross-flow one so worked out what I could get out of a few sheets of these plastic greenhouse panels and also what I could actually get up through the loft hatch. I came up with this design on the back of an envelope:
The idea is that air flows in one direction inside each of the twin-walled sheets which are spaced apart with thin strips and suitably sealed to allow air to flow in the other direction between the sheets. I also put thin strips as baffles down the centre between the sheets to better direct the airflow and to prevent sagging.
The sheets:
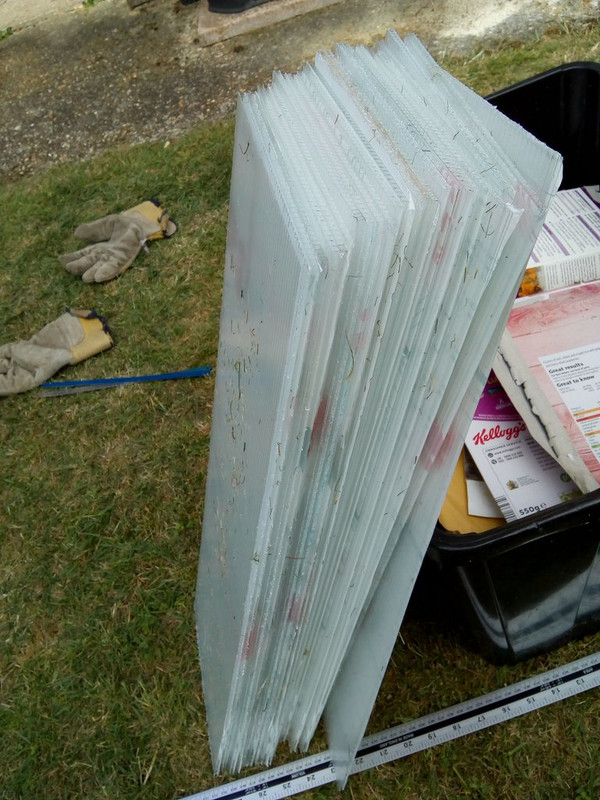
The cut strips:
The sheets are joined and sealed with sealant designed for polycarbonate windows on caravans and the like - this is really thick & sticky stuff and broke my first caulking gun (a metal one!), I think I used three tubes in the end.
The finished heat exchanger core:
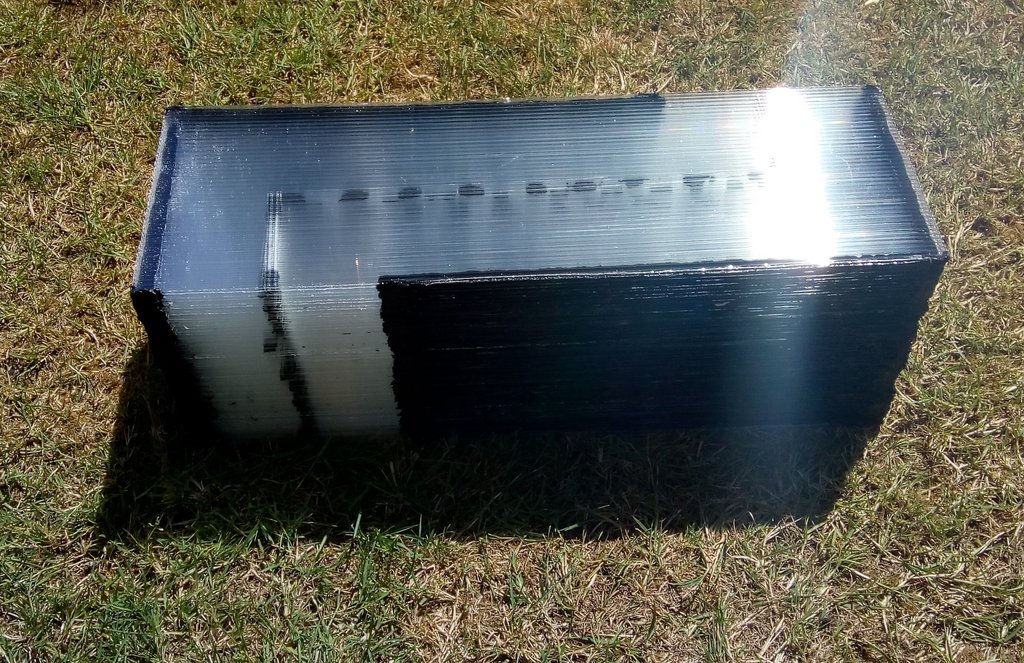
I built a box out of the same plastic sheets as I had some left over anyway and I wasn't convinced about using ply with the condensation. There's a small pipe running from the bottom as a condensate drain - I spliced it into an existing overflow pipe in the loft. Bought some 120mm flexible ducting and fittings to connect it up and used a pair of high performance 12V computer fans to run it via a home-made PWM controller.
The (almost) finished product:
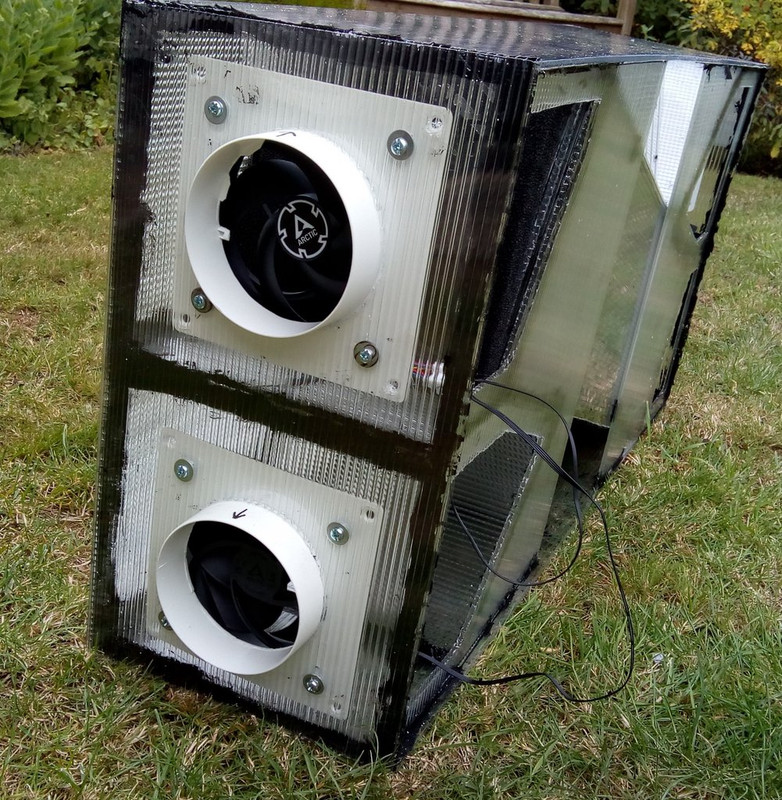
And installed in the loft:
-I've since put some insulation over it. The warm side ducting is burried under the loft insulation.
It extracts from the bathroom and feeds the main bedroom, I've definitely noticed the improvement in air quality upstairs. My house has good air-tightness upstairs (no trickle vents). Something this size isn't big enough to do a whole house but works well for a single room. I did try measuring air temperatures in and out, I can't be very exact but I'm guessing it might be as good as 90% efficient in heat recovery. The fans are only a couple of Watts at full speed.
Things to note if you're thinking of doing this yourself:
It's a lot of work -just squeezing out the sealant requires a lot of grip strength! There are a lot of layers and I could probably have got away with a slightly slimmer core for the fans I'm using. The fans are fine for the job running around quarter to half speed, I have a 'boost' button which runs them at full speed for ~15 mimutes but that's not really enough to clear steam or smells from the bathroom very well. I've been meaning to modify the controller to increase the boost to 30mins. max. - 150mm ducting would probably have helped the airflow. I can hear it at half speed or over but it's not intrusive - the M4 motorway is only a couple of miles away and that's often louder. I probably spent £120-£150 on it and you can buy one for £200-£300ish but it was a good project to do at a difficult time.
19.7kW PV SE, VI, HM, EN & DW
Ripple 7kW WT & Gen to date 19MWh
42kWh LFPO4 storage
95kWh Heater storage
12kWh 210ltr HWT.
73kWh HI5
Deep insulation, air leak ct'd home
Zoned GCH & Hive 2
WBSx2
Low energy bulbs
Veg patches & fruit trees
Ripple 7kW WT & Gen to date 19MWh
42kWh LFPO4 storage
95kWh Heater storage
12kWh 210ltr HWT.
73kWh HI5
Deep insulation, air leak ct'd home
Zoned GCH & Hive 2
WBSx2
Low energy bulbs
Veg patches & fruit trees
Re: DIY MVHR
Thanks !Stig wrote: ↑Sat Nov 20, 2021 10:31 am I posted about this on the other forum but as that's gone someone asked if I could redo the write-up of my DIY heat exchanger & ventilation system, so here goes:
It's something I'd been musing over for a while and when lockdown started last year I thought it would be a good project to help keep me sane. The idea is based on an article from the 80's which you can still find online at https://www.builditsolar.com/Experiment ... DIYHRV.htm
There were also some useful discussions on www.ecorenovator.org which sadly seems to be no more.
I decided that a counter-flow design would be more efficient that the cross-flow one so worked out what I could get out of a few sheets of these plastic greenhouse panels and also what I could actually get up through the loft hatch. I came up with this design on the back of an envelope:
The idea is that air flows in one direction inside each of the twin-walled sheets which are spaced apart with thin strips and suitably sealed to allow air to flow in the other direction between the sheets. I also put thin strips as baffles down the centre between the sheets to better direct the airflow and to prevent sagging.
The sheets:
The cut strips:
https://www.for-sale.co.uk/s/clothing-shoes-accessories
The sheets are joined and sealed with sealant designed for polycarbonate windows on caravans and the like - this is really thick & sticky stuff and broke my first caulking gun (a metal one!), I think I used three tubes in the end.
The finished heat exchanger core:
I built a box out of the same plastic sheets as I had some left over anyway and I wasn't convinced about using ply with the condensation. There's a small pipe running from the bottom as a condensate drain - I spliced it into an existing overflow pipe in the loft. Bought some 120mm flexible ducting and fittings to connect it up and used a pair of high performance 12V computer fans to run it via a home-made PWM controller.
The (almost) finished product:
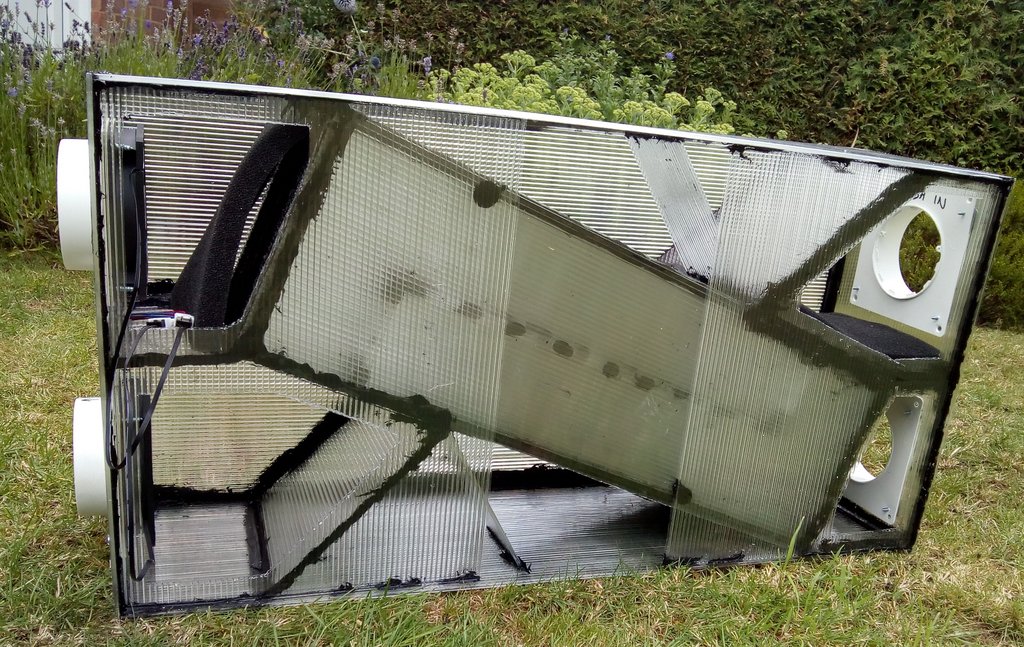
And installed in the loft:
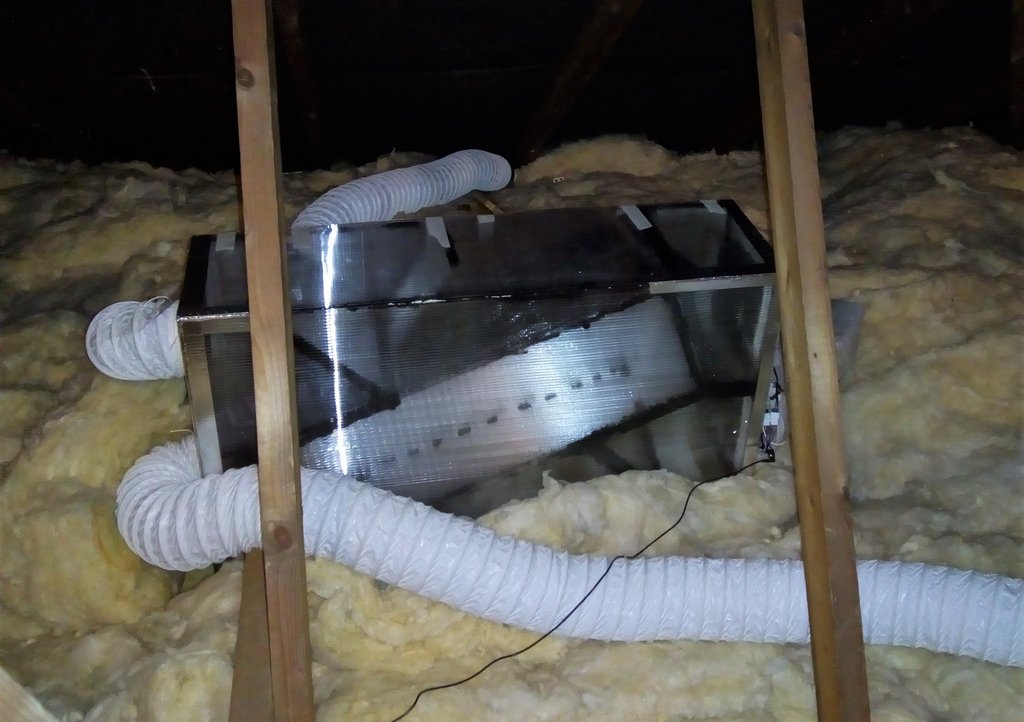
-I've since put some insulation over it. The warm side ducting is burried under the loft insulation.
It extracts from the bathroom and feeds the main bedroom, I've definitely noticed the improvement in air quality upstairs. My house has good air-tightness upstairs (no trickle vents). Something this size isn't big enough to do a whole house but works well for a single room. I did try measuring air temperatures in and out, I can't be very exact but I'm guessing it might be as good as 90% efficient in heat recovery. The fans are only a couple of Watts at full speed.
Things to note if you're thinking of doing this yourself:
It's a lot of work -just squeezing out the sealant requires a lot of grip strength! There are a lot of layers and I could probably have got away with a slightly slimmer core for the fans I'm using. The fans are fine for the job running around quarter to half speed, I have a 'boost' button which runs them at full speed for ~15 mimutes but that's not really enough to clear steam or smells from the bathroom very well. I've been meaning to modify the controller to increase the boost to 30mins. max. - 150mm ducting would probably have helped the airflow. I can hear it at half speed or over but it's not intrusive - the M4 motorway is only a couple of miles away and that's often louder. I probably spent £120-£150 on it and you can buy one for £200-£300ish but it was a good project to do at a difficult time.